Monday, December 17, 2007

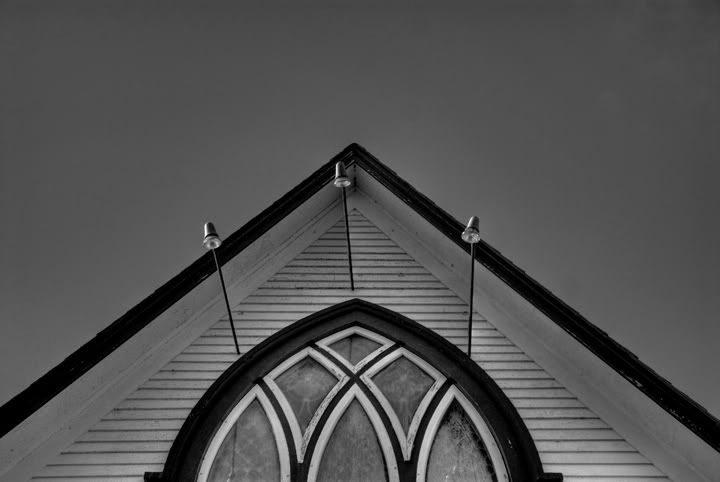
downtown hdr

Photo Sharing and Video Hosting at Photobucket
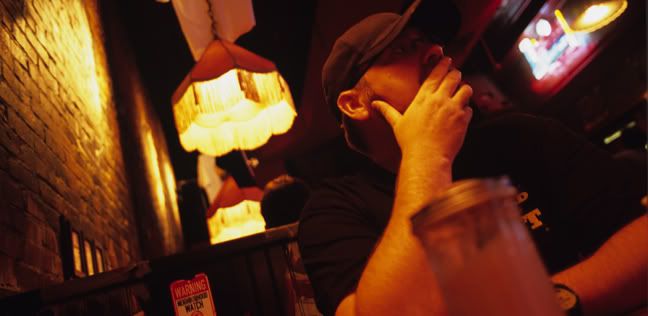
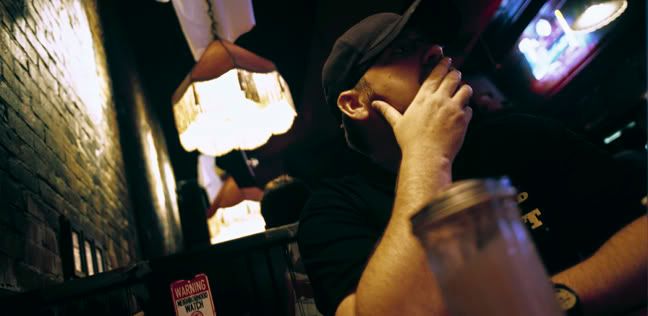
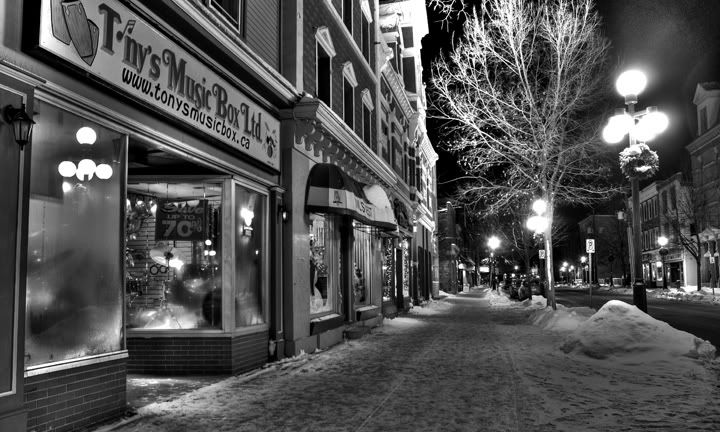
This may well be my last post from the images i shot in the freezing cold downtown a couple nights ago.
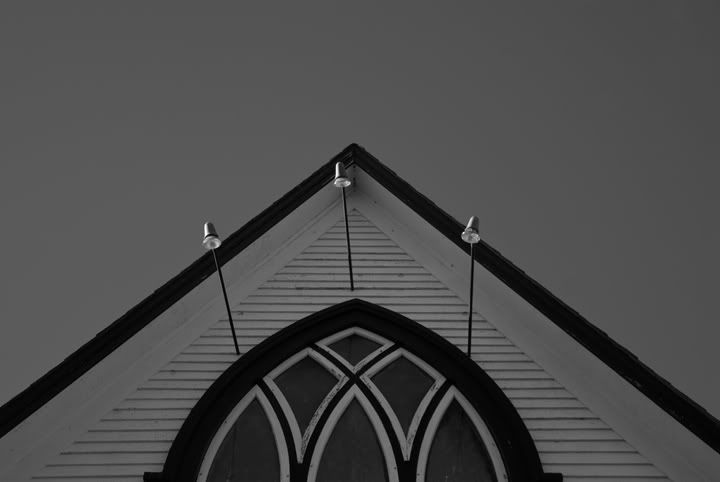
I processed three jpegs in photomatix and lowered the color saturation to the far left.
I sharpened it using smart sharpen.
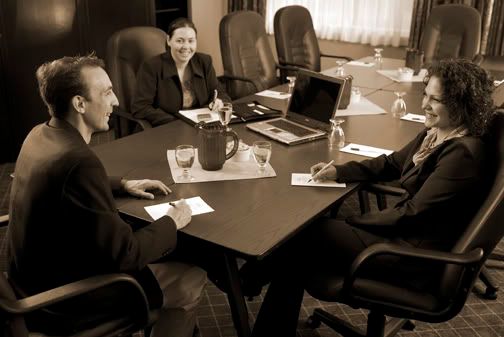
I wanted to try a bit of sepia tone on it for the old fashioned look but i am tired tonight and going to hit the hay.
I still plan to work on something totally different over the holidays and that is combining multiple face photos.

Saturday, December 15, 2007

restaurant hdr

Photo Sharing and Video Hosting at Photobucket
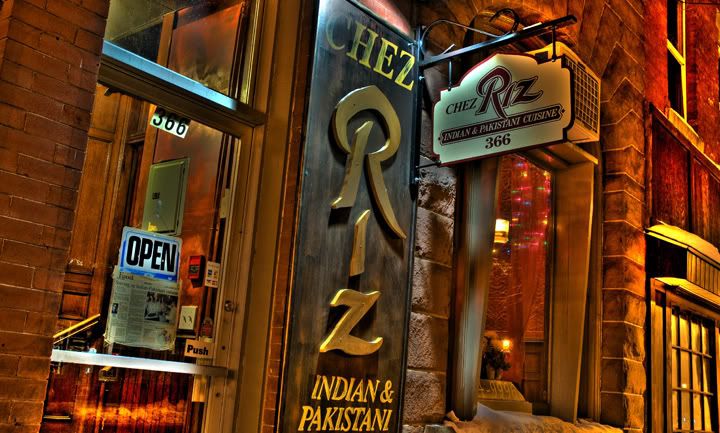
I was doing some downtown shots tonight and tacked on some time at the end of my official duties to take some hdr shots. I did this even though it was unbeliveably cold. My fingers still hurt.
I did my standard 7 frame bracket and then used photomatix pro to process the images.
My settings in photomatix were as follows:
strength 100, color saturation 68, luminance -5, light smoothing low, white point 1.35, black point 5.86, gamma 1.01.
This hdr shot looks 100 times better than the standard straight shot.
What restaurant wouldn't love to have a funky shot in a brochure or ad piece.

Friday, December 14, 2007

camera image number

Here is just a little aside.
Ever wonder how many images your camera has taken in its life.
1) go into bridge and click once on the last image you've taken.
2) go up to file - file info.
3) click on advanced (left column) when the file info pops up and then click on the little arrow beside http://ns.adobe.com/exif/1.0/aux/ (in the right column).
4) at the bottom of that column you will see
aux:imagenumber:????
where my question marks are is where your cameras total image count will show.
I have had my camera for two weeks now and only have 1200 images on it.
Time to get shooting.

desaturated background

Photo Sharing and Video Hosting at Photobucket
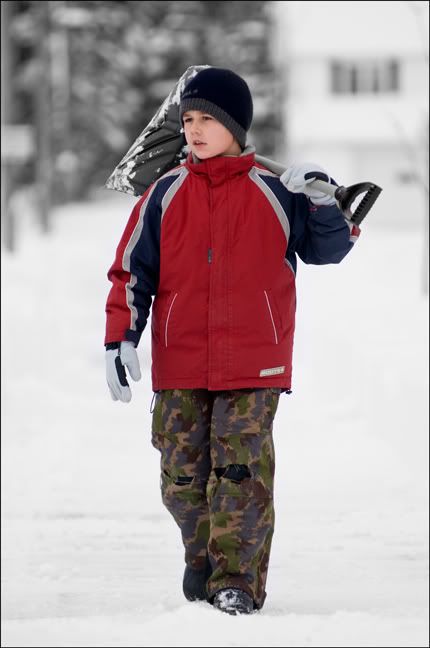
I took this shot of my son last week after a big snow storm. It was the perfect image to desaturate the background, as it was mostly colorless to begin with, and make my subject really pop.
This is a really easy one.
I duplicated my background layer. With this new layer active i went to image - adjustments - desaturate.
I created a layer mask (bottom of layers pallate) and painted in black over my son so that the colored layer underneath would show through. I didn't have to be too fussy as it was mostly white behind him anyway. I used a smart sharpen at about 35 and did a curves adjustment to bring up the blacks a bit for added contrast.
I am hoping to do some experimenting for my next post. I want to use multiple shots combined to form one shot. these would be overlaid over and around each other, not stripped together. I will work on an edge effect so the shots are seperated.
Stay tuned. I also have some shooting to do this weekend of the downtown at night. I smell a hdr in there somewhere.

weird

Photo Sharing and Video Hosting at Photobucket
This is strange for me and no dont worry, i am not heading in some far out direction.
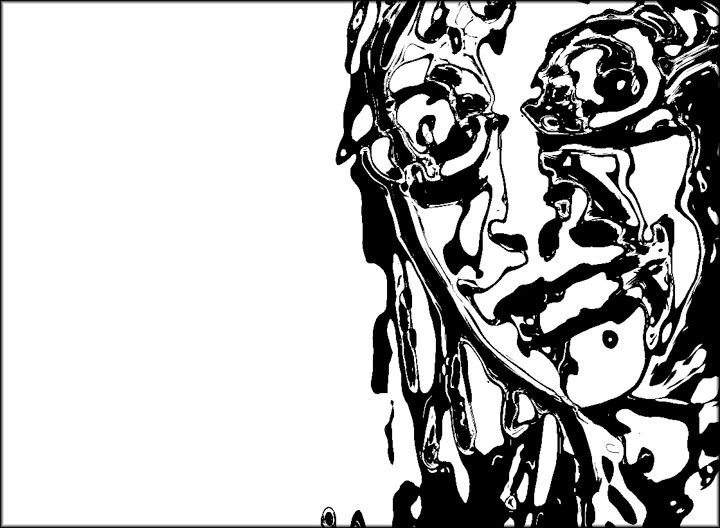
I took a photo of a girl i work with and converted it to black and white. I liked the shot but it didn't blow me away or anything. I thought it had enough potential to look at a second time and see what creative things i could do to it.
I started by duplicating my background layer and with the new layer active i went to filter - sketch - chrome. I used a detail of 0 and a smoothness of 10. I used a levels adjustment and cranked the sliders to the middle so i only had black and white tones.
I actually was going down a totally different route. I started by duplicating my blue channel as i was going to try and make a funky mask and bring parts of the original image through the chrome layer.
I thought this image i ended up with would make a cool poster if text was added.
One added note by the way: you can control how thick your black lines are by where your levels sliders end up. If they are closer to the black side or closer to the white side makes a difference.
For what i dont know.

Wednesday, December 12, 2007

theory of a retouch

Photo Sharing and Video Hosting at Photobucket
The image above got me thinking of a post on retouching.
There are many different views out there on retouching, from "oh my God, you cant retouch as then it is not pure or journalistic" to "anything goes". I like to think i am somewhere in the middle but definately closer to anything goes than to pure.
The camera and photoshop are tools in the image creation process and by developing your skill in both, you can create an image that you have envisioned.
Anyway, i am not trying to get all deep or anything, just trying to let you in on how i see the process.
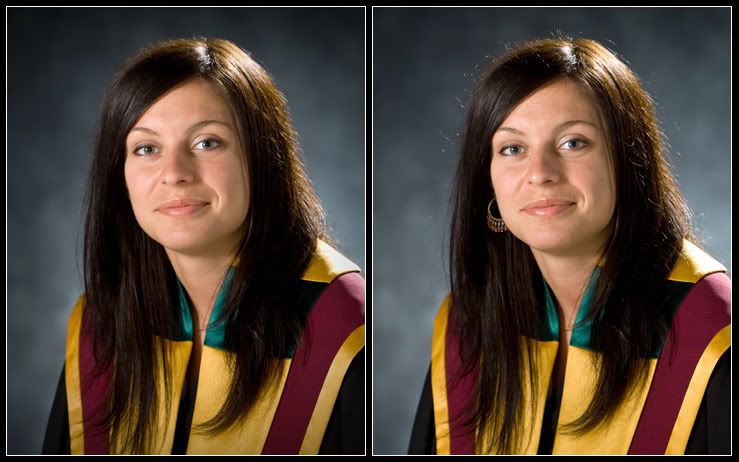
The image on the left is the final retouched version and the image on the right is raw from the camera.
How i tackle retouching is as follows. I first look at the image and decide what i want to look at. Her face for example. In the image to the right my eyes keep getting pulled off the face by the earring and more subtly by the hair highlights.
With these distractions removed I can take my time exploring the face. I tend to start at the eyes, wander around the face, and end up back at the eyes.
So, what i am trying to say is: When retouching, remove tension from the photo. Tension being those elements that want to rip your eyes away from what you really want to look at.
I used a combination of the healing tool, clone stamp, dodge, burn, sharpen, and ended by adding a vignette.

Tuesday, December 11, 2007

door

Photo Sharing and Video Hosting at Photobucket
Ok I know, this is another hdr image, let me explain.
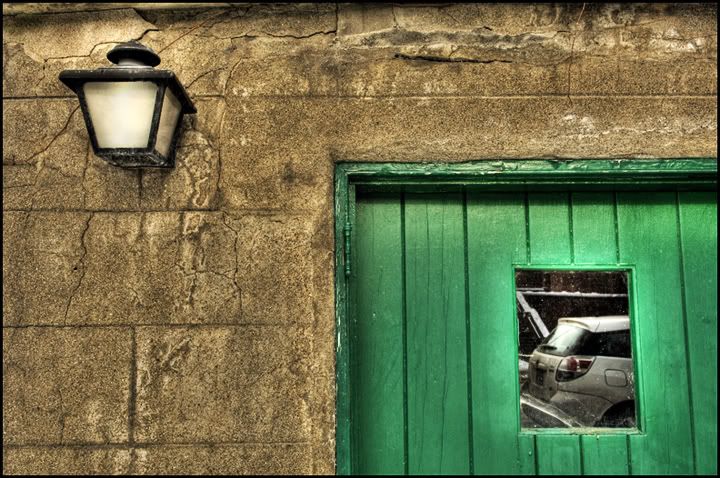
I saw this doorway and had to shoot it as i thought it would look amazing in hdr. I used 7 bracketed images and ran them through photomatix pro. I did my thing with the sliders, no secret, just played until it looked right, and then opened the image in photoshop. I wanted to brighten up the lamp as it was grey and low contrast. I first duplicated my background layer. I selected the front pane of glass on the lamp and applied a celinderical gradient going from white to transparent. It looked a bit better but not great. I tried changing the layers blend mode to overlay and it looked better but the rest of the image got over saturated and looked a bit overdone (can you imagine). I desaturated the layer and bingo, everything fell into place.
I am now going to be playing with changing the blend modes of a duplicated layer and desaturating it.

Monday, December 10, 2007

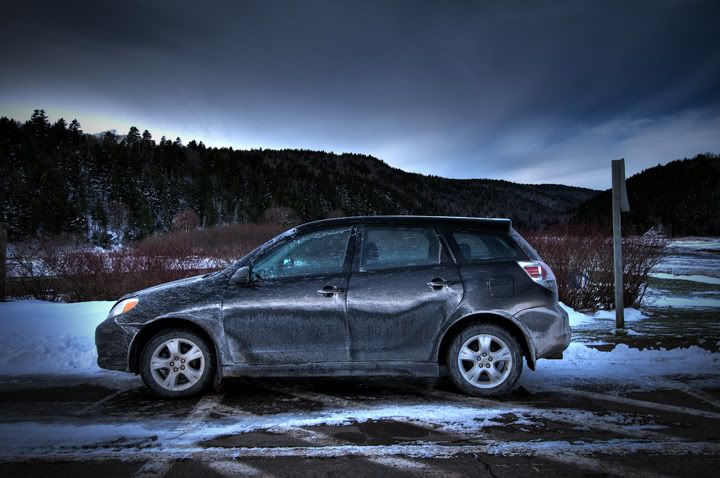
car hdr

Photo Sharing and Video Hosting at Photobucket
I was looking to do something a little different tonight (using blending modes to combine photos) but found that i have to take some texture photos as i dont have any. Look for this in a post to come. I want to change skin into an ice texture.
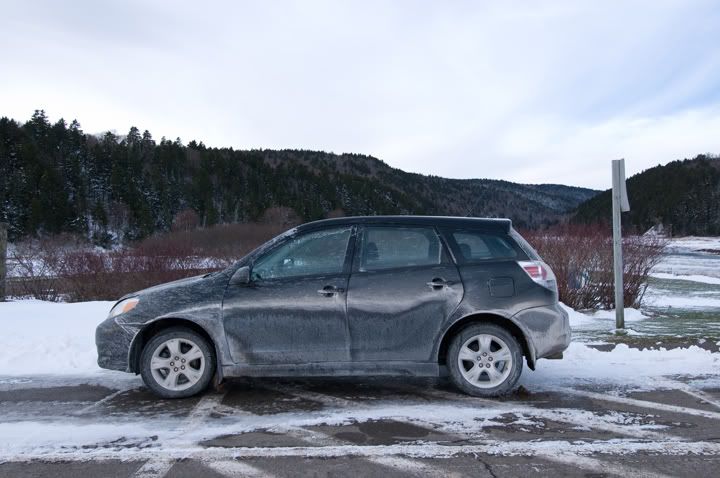
Anyway, i did find this shot of my car that i shot on a tripod and shot 7 bracketed images. I loaded the 7 images into photomatix and played with the sliders. I gave my workflow in photomatix in an earlier post if your wondering.
When i had it how i liked it, i sharpened it alot with smart sharpen, probably with a value of about 90. I then wanted a very dramatic vignette so i duplicated my background layer and added a heavy vignette (filter - distort - lens correction) to this top layer. It darkened the car a bit so i just applied a layer mask to that layer and used a large soft edged brush to paint on the mask with 50 percent black. I just painted over the car and a bit on the ground and background around it for a bit of a halo effect. I used a curves adjustment layer to add a bit of contrast and was done.
Below is one of the originals.
I promise to get away from hdr for the next post although i do feel that using hdr took a pretty boring image and at least made it into something worth looking at.
Photo Sharing and Video Hosting at Photobucket

Thursday, December 06, 2007

softar filter effect

Photo Sharing and Video Hosting at Photobucket
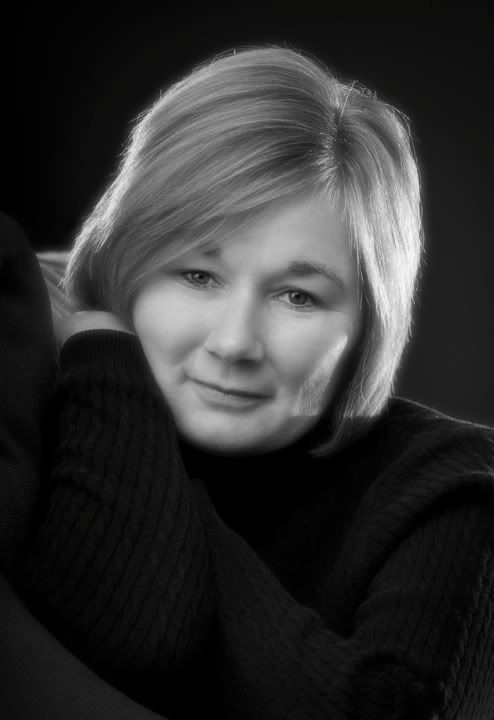
I need to state right up front that this is not my method. I used one of my photoshop world text books for this and the credit for its development goes to eddy tapp and monty zucker. I felt i needed the effect for this image and wanted to share it with you.
First i opened my image in photoshop and went to image - adjustments - black and white. I placed my curser on the face and left clicked and dragged to the left to lighten the skin. I placed it over the sweater and dragged to the right to darken the sweater. You would have to play a bit with this depending on your image. When i had it looking good in black and white i duplicated my background layer.
Double click on the name of your new layer and call it darken. With this layer active, go to filter - blur - gaussian blur and up the radius to around the size of your file (mine was 25mb so i set it to radius 25). Change the blend mode to darken for this layer and lower the opacity to 30%.
Now duplicate this layer and double click on the name and call it lighten. Raise the opacity to 50% and change the blend mode to lighten. At this point if it looks too soft just redo the image and use a lower radius in the gaussian blur step.
Next hold down the shift key and click on both layers to make them both active. While holding the shift key click on the "new group" icon at the bottom of the layers pallate. Now click on the add layer mask icon at the bottom of the layers pallate.
Using a black soft edged brush, paint over the eyes, lips, eyebrows, and nostrils. I used an opacity of 50% to paint with. I did all these parts once and then did the eyes and lips one more time still painting at 50%. I tried the hair also but did not like it sharp on this image.
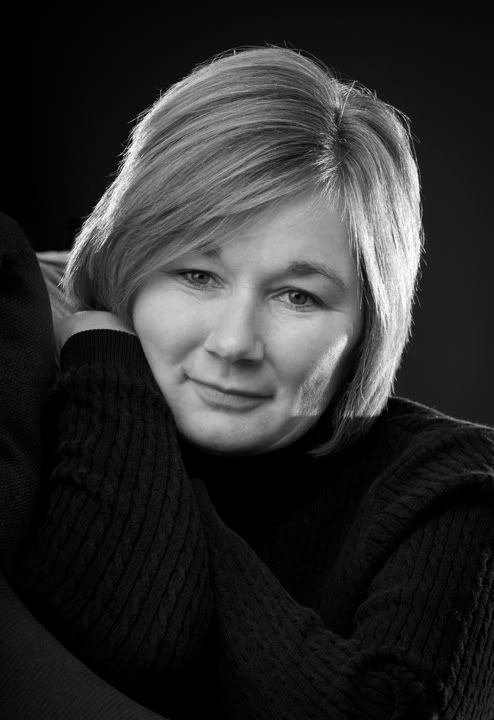
The original file is below.
As a side note: I was quite happy with the light on this image. I used two strobes bounced into very large umbrellas that were placed one directly over top of the other. This essentially gave me an umbrella which went from ceiling to floor. With using two lights i could vary the power from top and bottom. I placed these as close to her as i could, just out of camera frame. I used two sb24 flashes for the rim light. One was behind her to the left and one to the right.
Photo Sharing and Video Hosting at Photobucket

Monday, December 03, 2007

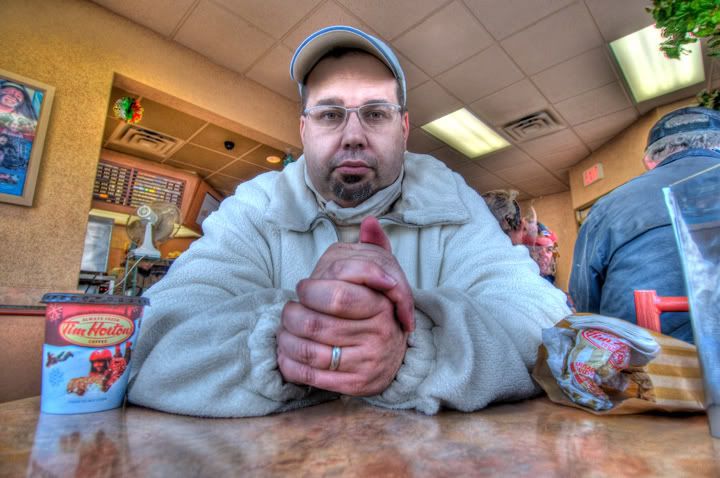
hdr gordo

Photo Sharing and Video Hosting at Photobucket
Here is another shot from the weekends adventure.
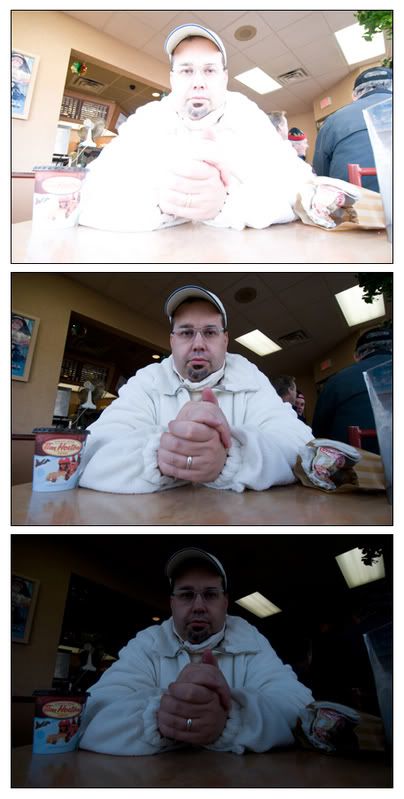
We haden't even really got to shooting yet but the light was so good in tim hortons that i had to run out to the car and get my camera. I put the camera in liveview to test it out and took three bracketed images handheld. I am posting the original files under this text so you can see them also.
I opened the images in photoshop just to knock them down to 8bit files (i had the camera set to 14bit) and saved them as jpegs.
I processed the three images two seperate times in photomatix and then stripped them together in photoshop. The reason i did this was that i liked his face and background in one of the trials and his hands and body in another. I just dragged one image onto the other and used a layer mask to do the work.
I am not giving my photomatix slider info just because it never seems to be written in stone. Just play with the sliders.
I wanted this look by the way in photomatix even though you may be screaming overprocessed. Gordo is truly a cartoonish figure and i felt the effect was needed.
Photo Sharing and Video Hosting at Photobucket

Sunday, December 02, 2007

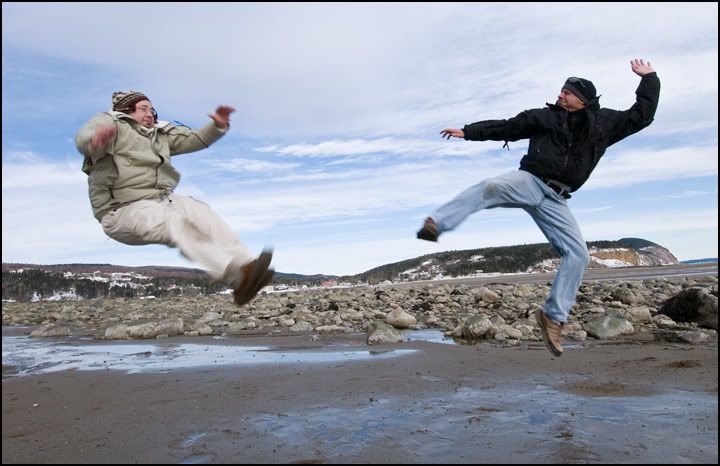
fight on the beach

Photo Sharing and Video Hosting at Photobucket
I got to get away and have a little photo excursion today and now have a ton of new images with which to play with. I will be making many posts this month.
This image is made up of two images. I set the camera up on a tripod and I took gordos photo serveral times as he did some pretty funny jumps. He then shot me doing the same thing. I opened them both in photoshop and while holding down the shift key i dragged one photo on top of the other. My tripod is not the best and it was also sinking in the sand which resulted in the photos not being perfectly aligned. In photoshop cs3 under the edit menu there is a new function called auto align layers which i used next. To get this to be ready to use you have to first go into your layers pallate and highlight both layers.
Auto align worked perfectly on these except for the clouds as they were different in each image. I next highlighted the top layer and created a layer mask. Use a reasonable sized soft edge brush with black as your forground color swatch and paint over the image where you want the underground image to show through (gordo was hidden on the underground layer). This made both of us visible in the image. The sky was not perfect so where i over painted i then switched my forground swatch to white and painted over the over painted areas around gordo. I flattened the image, did a slight curves adjustment to warm it up a bit, smart sharpened 45% and was done.
You can have alot of fun with this. Try shooting yourself in multiple positions in a room and then use this method to strip the images together.

Thursday, November 29, 2007

channel noise

Photo Sharing and Video Hosting at Photobucket
This photo was taken with a nikon d300 camera at 1250asa. Nikon has finally made some good advancements with noise reduction. As a side note, if you dont often need high iso's then just keep your d200's or whatever as you will not see alot of image difference.
I was reading the new napp photoshop magazine today and there was an article on reducing noise on just one channel. It didn't go into a whole lot of detail on the topic so i thought i would play with it a bit.
I started by scrolling through the channels in the channels pallete to see what one had the most noise. Definately the blue channel 9 times out of ten. Funny thing was however was that when i performed what i am going to tell you on the green channel it seemed to reduce more noise overall than the blue. Weird.
So i highlighted, or clicked on to activate, the green channel and went to the filter menu - noise - reduce noise and used a strength of 10, preserve details 9, and sharpen details 8.
I hit ok and then in the channels pallete clicked on the rgb at the top to view all channels together again. It softens the image just a bit but if noise is the problem then its worth it.
I also added a vignette to the image by going to filter - distort - lens correction, and moved the vignette - amount slider to the left (darken) to about -35, i also moved the midpoint to the left a bit too to make the vignette move in closer to the middle.
I put a black line around the image by simply going to image - canvas size and clicking on the relative box then putting in .2 to height and width. For background color i chose black.
Back to the camera for a minute.
I had the setting on the camera set to uncompressed raw and set at 14bit.
When i opened it in camera raw i opened it in the prophoto space (largest color space).
I made my corrections and then opened it in photoshop.
What you will have to do however if you do this is remember to go under image - mode, and knock it down to an 8 bit image when your done having fun with it in photoshop. You must also go under edit - convert to profile, and set srgb in the destination space if you want to put the image online or send it to a photo lab to be printed.
Sorry on this one to be all over the place.

Sunday, November 25, 2007

photomatix again

Photo Sharing and Video Hosting at Photobucket
I got a chance this weekend to get out and do some personal shooting in a small town not far from me.
It was great to just walk around and shoot whatever appealed to me. I also took the opportunity to do some shots to play with later in photomatix.
The image above was created in photomatix using three bracketed exposures. I have already previously done a post in this blog on how to use photomatix by the way so just scroll through to find more about it.
The settings i used here were strength 100%, color saturation 0, light smoothing - high, and then i played with the white point and black point until i got the look i wanted. I did nothing else to the above image other than smart sharpen 40%.
The bottom image is the normally exposed scene desaturated in photoshop for a comparison.Photo Sharing and Video Hosting at Photobucket

Wednesday, November 21, 2007

bridge slideshow

Photo Sharing and Video Hosting at Photobucket
I have been taking a ton of photos lately but none that i have really done any exciting photoshop work on which is the reason for the slow down in posts.
I did however give a talk on composition and learning to see last night which i accompanied with a slide show set to music.
I wanted to make it as easy as possible so i placed my images in two folders, one for the slide show and one for the photos i used during the talk as examples. I opened bridge and navigated to my examples folder first. I numbered the photos from 01 to 13 so they would be in order as i wanted them to show. I selected them all and then went up to the view menu and down to slideshow options. I set slide duration to manual (the slide would not change until i hit the right arrow key), caption - off, centered, transition - dissolve, and hit play.
After my talk was over i presented my recent work in a slide show. For this i set the slide duration to 5sec, caption - off, centered, transition - dissolve, and i slid the speed of transition slider to almost half. I then clicked the done button as i did not want the show to start right then. I went into bridge and selected all my photos so they would be all ready and then got the music ready.
I cued up the music in itunes. I had two songs which i put into their own library and hit play.
I then immediately clicked back on bridge and went under the view menu and down to slideshow.
Now that they were both running i just sat back and enjoyed it.
I used a laptop plugged into a data projector and also had a set of computer speakers for better sound.
I had timed the amount of photos to the music so that both would end at the same time.
The other nice thing was that i did not have to resize my images (most people would crop them all to 800px x 600px). I just stuck them in the folder as is (some of them were big files) and bridge ran them very smoothly.
I highly reccommend this method in running your next show.
The photo above by the way is just eye candy and has nothing to do with this post.

Thursday, November 15, 2007

a bit of everything

Photo Sharing and Video Hosting at Photobucket
Above is the finished version for a change. You will find out how it started at the bottom of this post.
First i duplicated my background layer.
Then I started with the most obvious problem, usually how i decide where to start an image, which of course was the pavement. I used a combination of the healing brush, patch tool, and clone stamp to fix this up, oh yea, alot of patience also.
When i had that looking ok i retouched out the lights on the building and any other little imperfections i could find. I then did a selection of the sky using the magic wand tool with a very low tolerance, between 5 and 10. I hit the refine edge button and contracted the selection by about 25 and feathered about .6. I then inversed my selection and hit the layer mask button which masked out the sky.
I opened a photo of a sky i wanted to use and then drug the image onto my group photo. I placed the sky layer under my background copy layer so the sky only showed up where my mask was on the layer above it. I moved it around until i got the part of the sky i liked.
I added a curves adjustment layer and a saturation adjustment layer and smart sharpened the file.
I used my burn tool set to midtones and darkened the building and cars down a bit to finish this one off.
Photo Sharing and Video Hosting at Photobucket

Friday, November 02, 2007

toned black and white

Photo Sharing and Video Hosting at Photobucket
I really liked this shot i took last week and have been playing with it to see how it looks best.
I shot it with natural light coming through the trees.
First in photoshop i retouched it a bit with the healing tool and then sharpened it with smart sharpen with an amount of about 60. I then went under edit - adjustments - black and white. When the dialogue box open up just ignore it. Instead of moving the slider in the box put your mouse over the part of the image you want to alter and press down on the mouse button and hold it. You now have a scrubby slider which you can move left (lighter) or right (darker). Take a look in the box and you will see that whatever color your mouse is over is the color that is being affected.
After i had the images tones where i wanted them in black and white, i added a curve and added a bit of yellow and red to the middle of the curve. This just gave me a slight warm, or sepia tone.

Thursday, November 01, 2007

photomatix pro

Photo Sharing and Video Hosting at Photobucket
As i promised a week ago, i am going to give a tutorial on photomatix pro.
If you are new to this software you can see some examples on flickr
(http://www.flickr.com/groups/hdr/pool/).
You can download a free fully functional copy of photomatix pro at
http://www.hdrsoft.com/
the only catch is that a watermark is applied. I would highly advise buying it from them as it is only $99 and you get 60% off if you are a student, teacher, or anyone associated with a school.
So how does it work.
It is a program that merges or blends together multiple exposures to give you a hdr (high dynamic range) photo. This means that you are able to see details in the shadows and highlights which may not be visable in a standard photo.
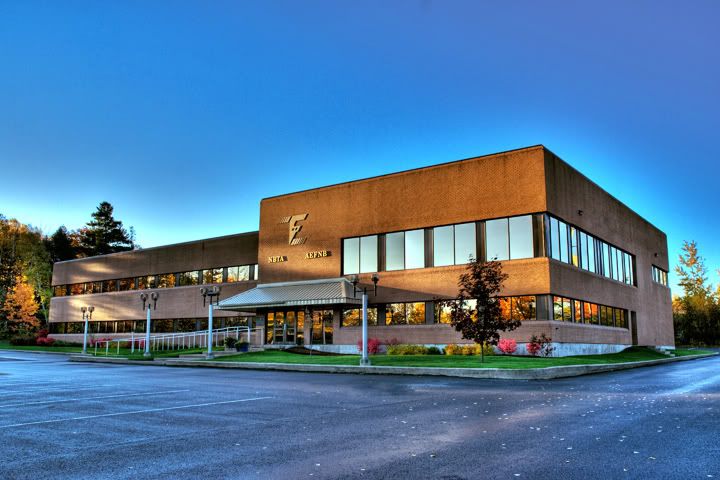
You can make the image look normal or go a little funky like i did to the building shot up top.
First start by using a tripod and bracketing your scene going from almost white to almost black. I usually take about 10 shots of a scene to then pick out 3 to merge together. Next open the images and save them as tiffs or jpegs (i used jpegs).
Put the three images in a folder that you can navigate to in photomatix.
Now open photomatix.
Close down the windows that pop open and go up to the "HDR" menu and down to generate. Hit browse and find the folder where your 3 differently exposed images are. Highlight all three and hit select. When the generate hdr window comes up hit ok.
A generate hdr options box will come up and check the "align source images" box. Also make sure the take tone curve of color profile (reccommended) box is checked and hit ok.
After it does all the work an image will appear and should look pretty bad. Thats ok.
Now go up to the HDR menu again and down to tone mapping. This is where you make your image decisions.
In the box that pops up just play around with the settings. I put the strength up to around 80 or more, the color saturation up, clicked the third or fourth light smoothing box (cant remember, sorry),and adjusted the white and black points to taste.
Hit apply and your done.
Once you do this a few times you will start thinking about images that would look good with this effect. You will also start carrying a tripod with you, which is something i never did.
Friday, October 26, 2007

combining people

Photo Sharing and Video Hosting at Photobucket
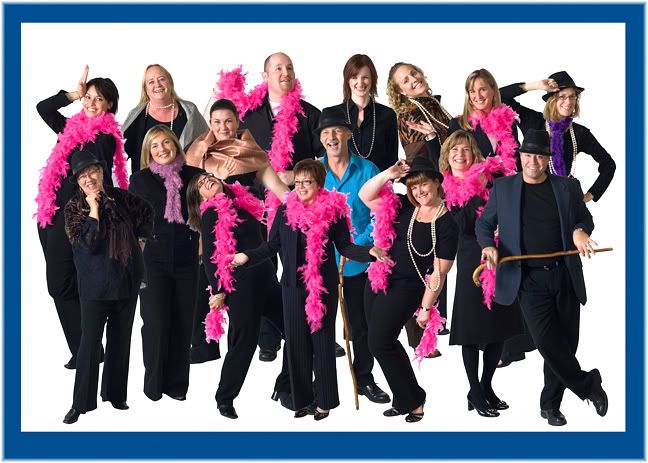
I am hired each year to shoot approx. 16 people individually, strip them all together into one photo, print 5x7's, place photos in frames, and then drop off the photos so the company can give them out the next morning at 7am. This year i shot at 6:30pm and had everything delivered at 12:30 that night, last night to be exact.
I started this process by creating a new image in photoshop with a size of 15x21 and 300dpi. I made it this size so it would reduce nicely to a 5x7 and because i shoot with a nikon d200 the individuals dont have to be reduced or enlarged in size when dragged onto this image. They fit nicely.
Next i open bridge in photoshop and rate the images (1 each) of each person 5 stars that will be added to the comp. I then open these rated raw files in camera raw and do my image adjustments. I then open all the files i have corrected in raw.
Now to each photo i select the white background, using the magic wand tool for ease and speed, set to a threshold of about 22. I get as much of the white as i can and then switch to the lasso tool and holding down the shift key i add the rest of the background. Next go to select - inverse to select only the person and then go into quick mask mode and tidy up the parts still not selected, mostly around the feet.
Once your happy with the selection get out of quick mask and hit the lasso tool (just so the refine edge button is visable) and hit refine edge. I set feather to 1px, radius to 1.5, smooth to 13, and contract/expand to -28. I hit the show on black button to check it and hit ok. Then i would reccommend going to select - save selection and saving it in case you need to go back and modify it.
Drag the image into your new image and then repeat this whole process for the next 15 or so people. If some white still shows around the hair or somewhere else when a black jacket is behind it then just create a layer mask for that layer and paint it out. I then just drag the layers around until they make a pleasing composition.
I sharpened, added a curve, and a bit of saturation and was done.
In the final image i also had a logo in the front which i took out in the image your seeing. I placed a border and some guides also so the people would extend approx the same width on both sides and then saved as a psd so all my layers were intact. Now next year when i do this shoot again, the template is already done and i just have to add the new people.
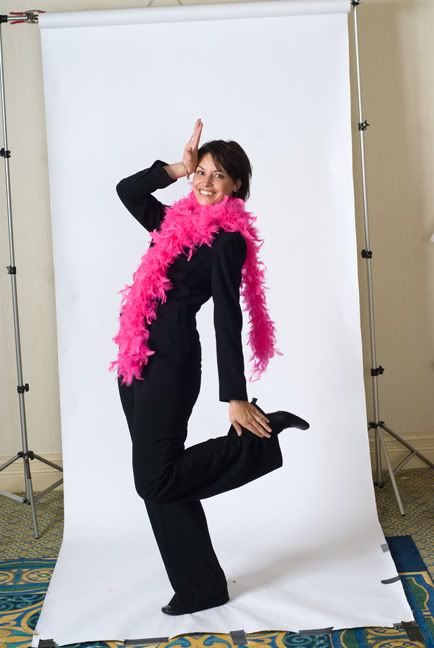
Below is a view of how things looked behind the scenes.
Photo Sharing and Video Hosting at Photobucket

Wednesday, October 24, 2007

just weird

Photo Sharing and Video Hosting at Photobucket
I dont know why i do things sometimes but in photoshop things just happen.
I was not trying for this effect but fell upon it. If you look in sports illustrated magazine you will see the effect used quite often.
I assummed that they would have made a selection and then just applied a stroke, which they very well may do. However this approach would be much easier, especially around hair.
I photographed this lady on a white background and selected the background in photoshop using the color range tool. Select - color range. Just click on the white area in the background and then hold the shift key down and click again, and again until the background is fully selected. I then went to select - inverse , clicked on the lasso tool (just so the refine edge button would show) and then clicked on the refine edge button. I entered a value of 36 for feather and +45 for contract/expand. Since she was on a white background I ended up with a white soft stroke around her.
Just so it would show i opened another photo, of a cool sky i shot tonight, and while holding the shift key down, dragged her onto it. I then wanted her a bit smaller so i used edit - transform - scale, and holding the shift key down to constrain the proportions drug the top corner down until the size looked good against the background. I cropped the image and was done.

Monday, October 22, 2007

more retouching

Photo Sharing and Video Hosting at Photobucket
I took this group photo and somewhere along the way decided that i did not like the plywood under their feet. We have done the shot in the same location for about 6 years now so moving them was not really an option. Photoshop of course to the rescue.
I started this process by selecting the board. I used a bunch of selection tools, color range, magic wand, and so on until i had the best i could do with them and then switched to the quick mask mode. If you havent used this mode to finess your selections you have to try it. It is located near the bottom of the tools pallate on the left side of your screen. You click on it to get into it and click it again to exit it. It turns everything red that is not selected and you use your paint brush with white to take away the red (adding to your selection) and black to add red (adding to your selection). The nice thing about selecting this way is that you can use a soft edged brush to get a nice soft edge selection.
Once i had the entire plywood selected i hit the refine edge key to feather my selection just a bit then i duplicated my background layer and hit the delete key to remove the board from that layer. I then turned the top layer off (eye on the left side of the layers pallate and clicked on my background layer to work on it.
I went into filter - vanishing point and drew my grid for the walkway. I will not go into detail about using vanishing point here but if you are cloning anything that has perspective then you should do some reading on it. I used the clone tool with heal turned off in the vanishing point window and cloned the walk so it would cover the entire board that was visable. Now when you turn the top layers visibility back on the board, which we deleted, is now walkway.
Lastly i make a selection of the building sign where it was in shadow and did a curves adjustment to it to brighten it up a bit.
Here is the finished product.
Note: tomorrow i will be doing a tutorial on photomatix pro so stay tuned.
Photo Sharing and Video Hosting at Photobucket

Saturday, October 20, 2007

displacement map

Photo Sharing and Video Hosting at Photobucket
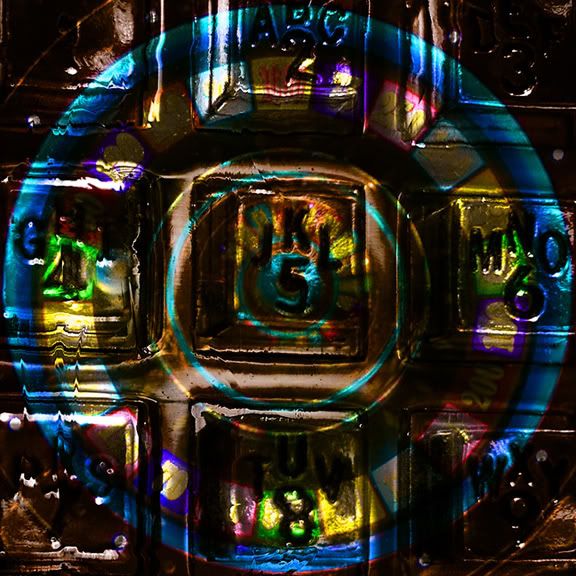
I have been noticing the use of displacement maps in a few new photoshop books i got recently and thought i would give it a try.
I dont know if i have chosen the best two images to demonstrate this effect but i liked the results so thought i would post it.
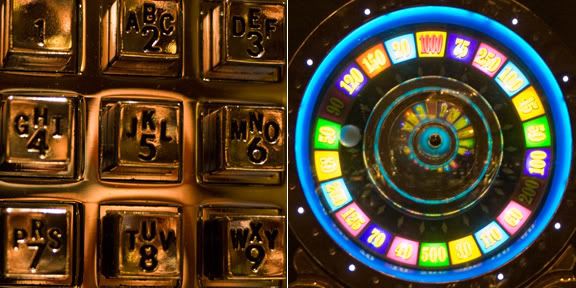
You start by opening the image you want to use as the texture, i opened the phone dial pad. Next open the image you want this texture to be applied to, i opened the slot machine image. Then drag the slot machine image onto the phone image using the shift key to center it. note: i cropped both images the same size before i started.
Then click on your background layer, the phone, and duplicate it (ctrl - j).
Move this new layer to the top of the layer stack and then desaturate it (shift - ctrl - u). Now save the image as a psd but unclick the layers button when the save as dialogue opens. This will save the file but will flatten the file.
Next go back to your top layer, probably still on it, and change the blend mode to hard light. This will blend the phone into the slot machine. To make the phone contour better to the slot machine we have to now use a displacement map.
Click on the slot machines layer and then go to filter - distort - displace. When the dialogue opens type in 5 for horizontal scale and 5 for vertical scale and click on wrap around. You can also leave stretch to fit checked. Click ok. When the open dialogue appears, go to the file you had saved earlier and select it and hit open.
I added some saturation and adjusted the curves after all this was done and sharpened using unsharp mask quite heavily.
I know this was a confusing post and i appoligize. I will try it again soon with two different images.
These are the two images below that i started with.
Photo Sharing and Video Hosting at Photobucket

Friday, October 19, 2007

masking multiple frames

Photo Sharing and Video Hosting at Photobucket
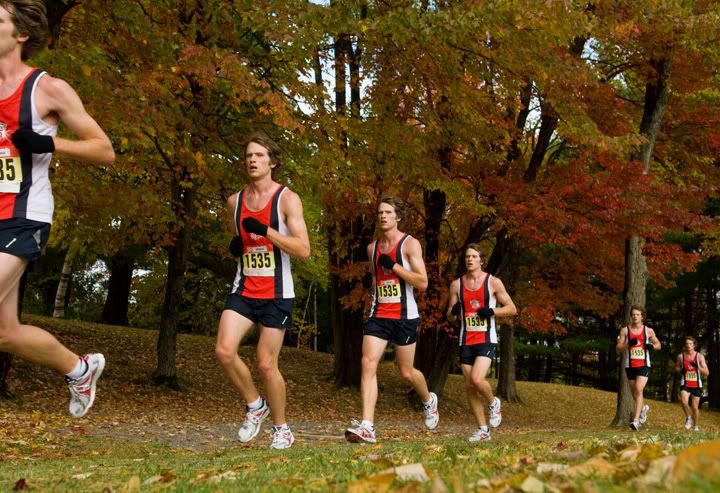
I was recently shooting a cross country race in the park and had an idea to take multiple shots as a runner went by and then strip them together. Piece of cake right? Just use a tripod and nothing changes but the runners position.
Problem was i forgot my tripod. I also wanted a very low angle. So, hand held it is. I laid on the ground and tried to hold the camera very still. I prefocused and turned auto focus off. I took multiple shots as he ran by and the shoot part was over.
In photoshop i processed the images in camera raw and then opened all the ones i wanted to use, actually more than i needed in the end. Once all were opened i held down the shift key and using the move tool drug them one by one into one frame. I used the shot where he enters from the right and drug the rest, in order of his position, onto it.
I next used the new function in cs3 called auto align layers found under the edit menu i think. It did a great job and compensated for my not having my tripod.
I clicked on "layer 1" in the layers pallate and then drew a rough selection around the guy and hit the refine edge button. I smoothed the edge a bit and used a feather of about 2, then hit ok. I then select - inverse my selection and created a layer mask in the layers pallate. Since black was my foreground color it filled my mask with black, leaving only the runner to show through to the layer underneath. I repeated this process for each layer until all runners were showing through and all backgrounds were masked except for the original image.
I flattened the image and smart sharpened it. I also used a hue saturation adjustment layer to boose the saturation up a bit and was done.
I am sure no one will ever use the shot for anything but it was just fun to have fun.
Oh, i cropped it a bit also, just height wise. It is full frame on the length.

Tuesday, October 16, 2007

trying to make something out of nothing

Photo Sharing and Video Hosting at Photobucket
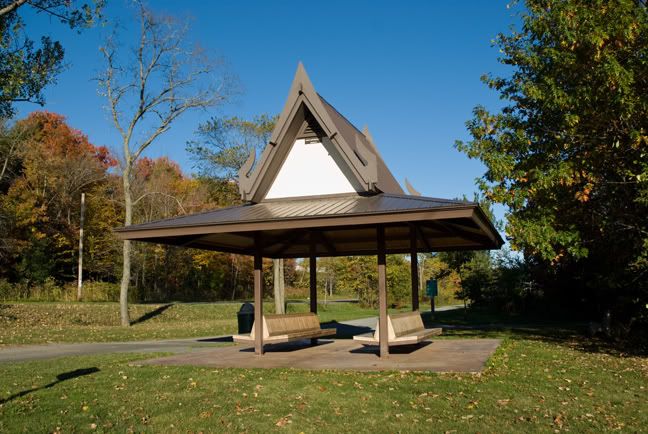
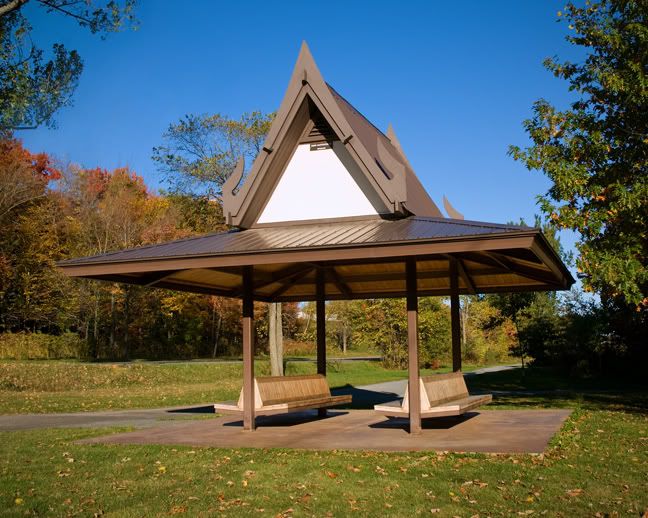
I was asked to photograph this thai shelter so my city could give a gift to a travelling thai delegation. It really is not the best photographic subject so i thought, how could i make it look its best.
I picked early morning to shoot it so the light would be on the shelter and there would be some shadows.
I also bracketed my exposures as i was planning to use hdr to lighten the wood under the roof and darken down the sky and i shot it from every angle possible. I downloaded my photos and made a quick web gallery in photoshop and sent the link to the client. They picked this view and then i got to work.
I had forgotten my tripod so using multiple shots proved difficult in hdr.
I picked the best exposure and opened it by going to file - place so it would come in as a smart object. Now the trick to this is you actually have to open your photo before and do a select all - copy. Then close your image. Now when you create a new document, place, it will be the right size automatically.
After having this open i wanted another smart object layer so i went to layer - smart object - new smart object via copy. This will give you two seperate layers and each is editable in camera raw, independantly of each other.
I double clicked the top layer and changed the camera raw settings for the under side of the roof. I then created a layer mask and painted everything in black except for the underside of the roof.
I then flattened my file so i could retouch. You could also just created a top flattened layer by clicking on shift - control - alt - E. Or something like that.
I used a combination of the healing brush, clone tool, and patch tool to get rid of what i thought were distracting elements.
Like the dead tree, garbage can, sign shadow, just to name a few. I added a curves adjustment layer and a saturation layer.
I then did a selection of the tree in the upper left corner and copied and pasted it into place so that corner would not be bare. Next came smart sharpen and lastly i added a vignette by going to filter - distort - lens correction.
Here is the final image.
Photo Sharing and Video Hosting at Photobucket

Wednesday, October 03, 2007

white socks

Two posts ago i put up a shot of me looking pretty macho in front of a white mustang. Well guess what, i was wearing my wifes white stubby socks. How cool am I.

previsualization

Photo Sharing and Video Hosting at Photobucket
This isn't so much a post about photoshop techniques as it is about the diary of a job. I will sneak in a photoshop tip however so please continue reading.
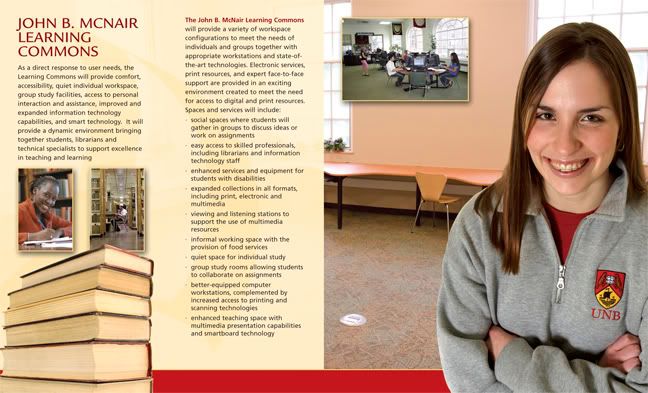
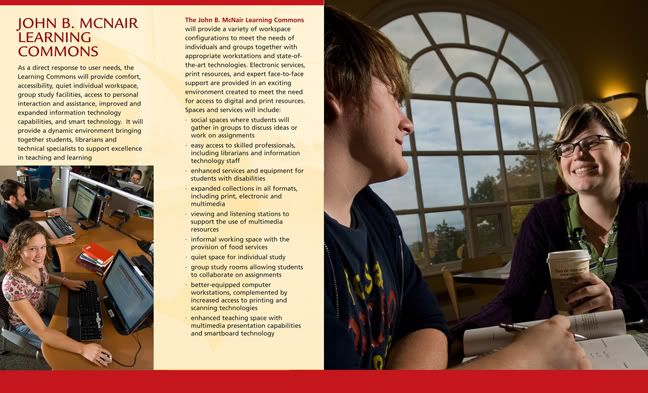
I was sent the beautiful brochure you see before you, as a pdf file, and was asked to freshen it up photographically. It is for a library and the main commons area was just redone. They felt the photos were stale and did not portray the new, lively theme of the library.
I booked the shoot for this morning and ended up shooting 4 different areas in the span of about 2 hours. I went in without any preconcieved ideas except for the lighting. I wanted the light to be a bit edgy and dynamic. In some shots i used three lights and in others i used two, plus some ambient here and there.
We did not have models lined up but instead just grabbed people that were there. They all ended up being great which is rare. I tried some different angles at each location and varied my lens choice pretty well through the range of 12mm to 200mm.
I only took about 120 frames but felt quite happy that i may have something when we were done.
I downloaded the images, retouched a bit in photoshop and rated the images. Out of the 4 different shots i ended up liking 2. I then opened the original pdf of the brochure in photoshop and stripped in the two shots i liked. I added a bit of a red border to the top of the page and was done.
One thing i did not plan but just worked out was the fact that in each photo my main subject would be facing the center of the page.
insert: - photoshop tip. In the photo on the left i brightened up and corrected the color of the computer screens (actually on another file and not the one i am showing here) by selecting the screen (1 at a time) with a combination of the magic wand tool and the lasso tool and then applying a curve to that selection. Remember that when you have a selection and you then go to edit - adjustments - curve only the area inside the selection will be affected. end of tip.
Below is the revamped brochure.
Of course i have not heard back from the people who made the initial request for the images so i fully expect an e-mail tomorrow stating that they would like the shots to be brighter (flat light), without any shadows (flat light), and to include someone of a different ethnic origin, perhaps even someone who is disabled so everyone will know that the space is wheelchair accessable.
I will then walk down with an on camera flash and put them all in a row and go click, click and the client will love it.
Photo Sharing and Video Hosting at Photobucket

Friday, September 28, 2007

place into

Photo Sharing and Video Hosting at Photobucket
Yes I know, this is an easy one. Could be done in your sleep. I know.
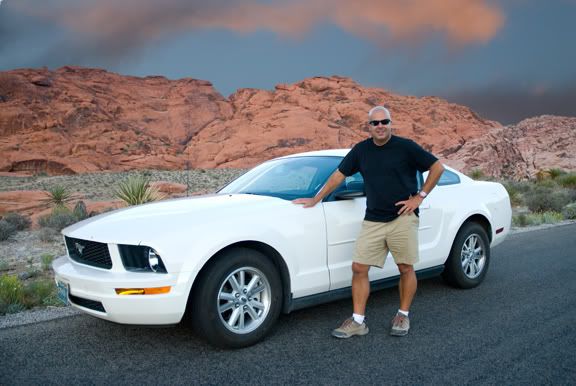
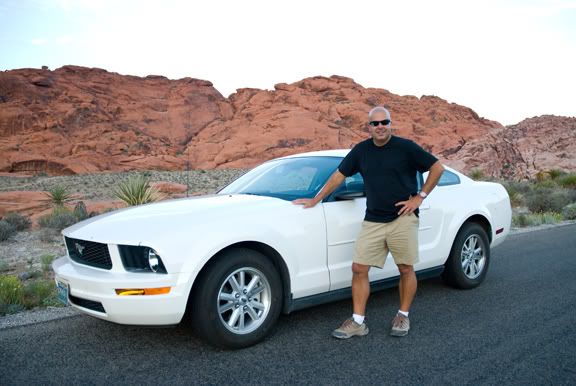
I started by showing you the finished version and if you scroll down you can see the starting image. This is a photo of yours truly just out for a sunday drive in red rock canyon in las vegas. I was there for 6 nights for photoshop world recently and wish i could have done some more exploring.
Anyway, back to photoshop.
This image screamed for a sky. I didn't look far and perhaps could have picked a better one, but this one was in the same folder. I started by selecting the sky, not with the magic wand because that is bad, but with the select - color range command. The secret to this tool is to not just click once in the area you are selecting and then playing with the fuzzy slider. Just like adding to a selection with the wand tool, you hold down the shift key and click around the area you want selected. Then if need be slide the fuzzy stick.
After i had a good selection of the sky i used the lasso tool to deselect the car and my socks as they too were white and got selected. I then hit the refine edge button and expanded my selection so i would avoid the white line on the horizon.
I opened the image i wanted to take the sky from and did a select all, and then hit edit - copy. I went back to my main image and did an edit - paste into.
This placed my paste on a new layer with a layer mask all done. With this top layer selected i could then move it around with the move tool to place it where i wanted it. It looked pretty good but i then just flattened the file and retouched the little parts of the horizon that didnt look so good.
I did a curve adjustment, bumped up the red a bit, and then smart sharpened about 40%.
I would not reccommend a mustang by the way. Stick with volkswagen.
Photo Sharing and Video Hosting at Photobucket

Wednesday, September 26, 2007

person swap

Photo Sharing and Video Hosting at Photobucket
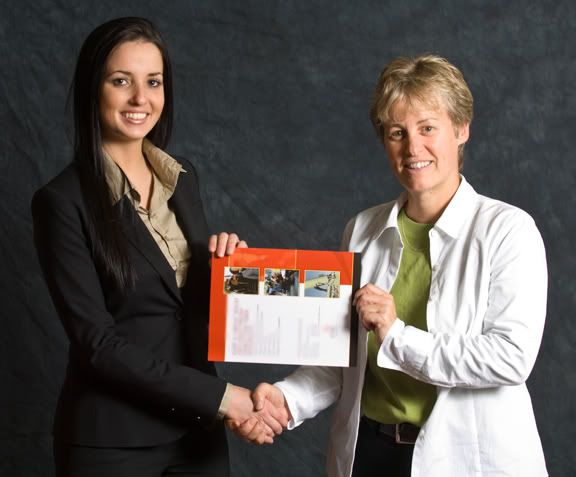
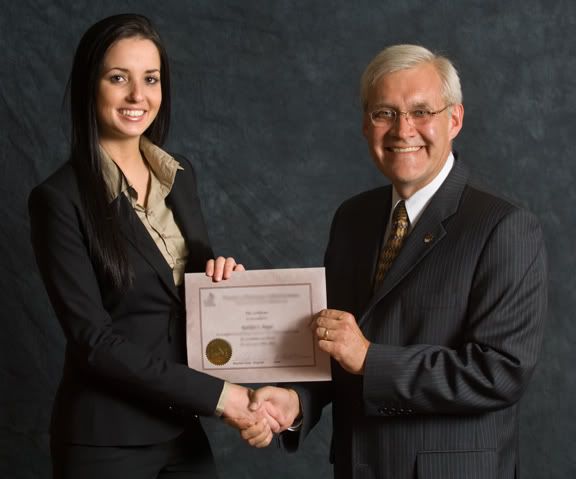
This image is from a shoot i did last week where i had to photograph about 70 deans list students shaking hands with the dean. Well, the girl on the left was early and the dean was late and she had to go. Bring in the stand in. My co-worker/boss did a fine job but deans list students are smart and she may rather be seen with the dean.
I looked through the other photos to find one that had his hand shaking hand in about the right place to start. I did a loose selection of him (very loose) with the lasso tool. Then using the move tool i drug him out of that photo and into the one in which i needed him. I moved him into place and then created a layer mask and with a large soft brush i painted in black on the mask to blend the backgrounds from the two images together. This was very easy. I then made my brush much smaller and started carefully masking out the excess from my top layer. I did a bit of cloning where needed and then healed it a bit to blend better but for the most part just masked the layers together. The fingers on top of the certificate ended up way above where they were suppossed to be so i did another rough selection of her fingers and copied it and pasted to a new layer. I then slid them down into place and rotated them a bit using transform. I made another mask to clean up around the fingers and was done.
I should also mention that i used one light here placed to the right and bounced into an umbrella.
Photo Sharing and Video Hosting at Photobucket

Monday, September 24, 2007

letter enhancement

Photo Sharing and Video Hosting at Photobucket
I recently was asked to take a photo of a friend of mine who has just been inducted into the radio broadcasting hall of fame. He brought with him a prop which looked like a microphone but was actually a fm radio. When you plugged it in the letters on the top lit up. Well of course they were not that bright so i brought them to life in photoshop.
At the time i did this i used the magic wand tool and selected the letters. I selected one and then held down the shift key to add to my selection. When they were all selected i then hit the refine edge button and feathered the selection just a touch so the edges would look better. I then used a curve adjustment to add contrast and while still selected then bumped up the saturation. That pretty well did it.
Looking back now i would reccommend trying the selection with the color range command. I'll bet you could get it in one click. This is by far the best tool to use for selections as it gives you a great natural edge. If you saw a selection from the magic wand tool beside a selection made from the color range command I guarantee that you would never use the wand again.

Thursday, September 20, 2007

coming soon

Sorry for my lack of posts lately.
I just got back from photoshop world in las vegas and i have a ton of new photoshop tips and ideas to share.
I also took about 1000 images while i was there so some of those should be appearing soon.
Thank you all for your patience.
I will try to get something up tonight.

Friday, August 24, 2007

combining elements

Photo Sharing and Video Hosting at Photobucket
This is just another example of why i love digital photography.
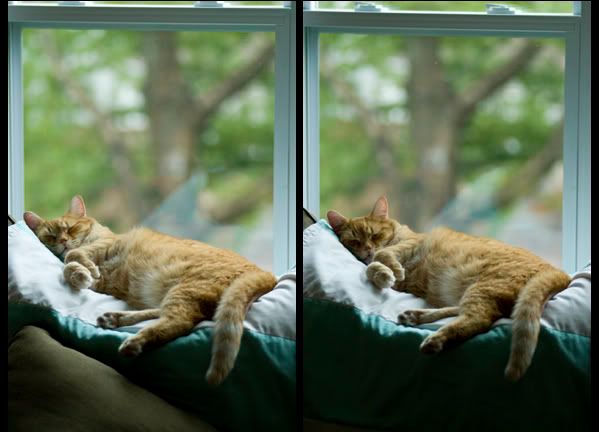
I saw my cat sleeping very comfortably and thought i would grab a shot without disturbing her. After i took about 10 frames i noticed the pillow on the bottom left of the frame and decided that it was distracting. I snuck over, moved the pillow, and took some more shots. But she moved, just a bit, and the light on her face was not as good. No problem, its digital.
I made a selection of the dark part of the image, without the pillow, just using the lasso tool. I hit the refine edge button and feathered my selection by 3. Then holding the shift key (to center the move) i dragged the selected part of that image onto the other image, creating a new layer and covering the pillow. To refine the edge just a bit more and soften it I then made a layer mask on my new layer and painted over the edge of the selection with a large soft brush. Just like erasing the edge of it but the mask allows me some flexibility.
I then got really fussy and decided i wanted the window frame to be more square. I used the transform - skew command and drug the corners a bit till the window looked better. I then sharpened the image, did a bit of healing on some stray hairs and was done.
Here is the final product.
Photo Sharing and Video Hosting at Photobucket

Thursday, August 23, 2007

xray filter

Photo Sharing and Video Hosting at Photobucket
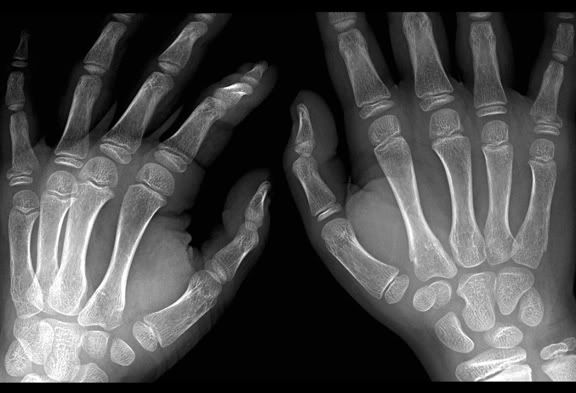
If you have cs3 and have not yet found the xray filter dont feel bad as your not alone. They hid this very well and i feel fortunate to have found the filter that can turn your photos into xrays with the click of a button.
Are you excited, well of course you are , and now i feel bad as i have been pulling your leg. This is actually an xray of my sons hand as he broke his baby finger this week. Can you find the break???
The original image , two put together here, was quite low contrast and really not that sharp. I applied an adjustment curve and tweeked the shadows (darker) and the highlights (lighter) and then applied a smart sharpen to crisp it up.
To get both images into one i created a new window (sized so both would fit) and made the background black. I dragged both images into the new window and moved them around as i wanted them. I then used a layer mask to erase the top layers parts that were blocking out the bones on the underlying layer. I flattened the layers and saved as a jpeg.
This was just a fun post and as i am approaching 1000 page views so far this year i will put the push on to create some informative posts in the near future.

Thursday, August 09, 2007

hard color correction

Photo Sharing and Video Hosting at Photobucket
I was hooking up my slide scanner to a new computer and thought i would try a scan to make sure it was working.
This above image was shot on daylight slide film inside a bar (having breakfast in boston) full of tungsten lights.
I made the scan and saved the file as a tiff.
I then opened it in camera raw (just go to file-open and when the dialogue opens select camera raw as the file type on the bottom left of the box, assuming you have cs3 of course (works with jpg and tiff)) and made some highlight recovery corrections and clarity, vibrance, etc. The temperature and tint however did not help me much in taking out all the red color.
I then opened the image in photoshop and applied an adjustment curve, adding some cyan and green and blue to highlights and shadows. This got me closer but not enough. So now what, how can i correct the image so i can live with it.
I converted the image to black and white using image-adjustments-black and white. Still not happy.
I then brought back some of the color by going under edit-fade and brought the opacity down to 38%.
This was the best i could muster with this one.
I should have just picked a different slide to scan.
Finished result is below.
Photo Sharing and Video Hosting at Photobucket

Sunday, July 29, 2007

sepia toning

Photo Sharing and Video Hosting at Photobucket
This is a little lesson on sepia toning as a result of being asked how to do it tonight and me not remembering, how to sepia tone that is.
There are always a few ways to do one simple thing so here is two.
1. Open your photo in photoshop and go to window - actions.
Expand the default actions tab {by clicking on the little triangle to the left of the words default actions} and then scroll down and highlight {click on} the sepia tone action.
Next just hit the play button at the bottom of the actions pallate and presto you have a sepia tone image.
Personally i did not like what the action did all that much so i went into my layers pallate and double clicked the round half black and half white circle on the hue/saturation layer which allowed me to edit the sliders. I lowered the saturation a bit and moved the hue slider to the right just a bit.
Much happier.
If you then look in the history pallate you can see how this was done.
First a duplicate background was made and then desaturated. Next a hue and saturation adjustment layer was created which gives the image its sepia tone color.
The really important thing to notice in the hue/saturation box is that the colorize box is checked. This allows the color to show on a desaturated image.
Have to put my son to bed now so will finish the other method soon.

Friday, June 29, 2007

photoshop for flowers

Photo Sharing and Video Hosting at Photobucket
I know, i promised camera raw stuff and believe it on not i am half keeping my promise. The image above was shot by myself tonight with a lensbaby and a macro lens adapter. This version has not been tweeked and is how it looked out of the camera. So what would i do to improve it.
First of all i opened it in camera raw and set my exposure and black settings to get the contrast looking right with no blown out highlights. I moved the recovery slider to 7, the clarity to 15, vibrance to 15, and saturation to 3. I then went under the lens correction tab and set the lens vignetting to an amount of -24 and the midpoint to 18 to apply the vignette i wanted. I then opened the image in photoshop.
I used the healing tool to take out a few blemishes and then smart sharpened about 50 amount with a radius of 1. I did not need to use curves as i had already did all the work in camera raw so i moved to my apply image effect to add some information into the red channel to give some depth to the flower. I wrote about this in detail in an earlier post which you can find on this blog.
The results of all this work are subtle but when compared side by side the tweeked version looks much better.
Photo Sharing and Video Hosting at Photobucket

Wednesday, June 27, 2007

more camera raw

Photo Sharing and Video Hosting at Photobucket
The photo above really does not mean anything to this post, it was just one i was playing with and thought i would add it for eye candy.
I have been experimenting with the new vibrance and clarity sliders in camera raw and have found these settings work good.
Clarity at 12 - 15
Vibrance at 12 - 15
Saturation at 3
I also played with the spot retouch tool in raw and it worked great.
To use this you click and drag a circle over the dust spot and then drag the other circle that appears to the spot you want the heal to sample from. If you want to resize the circle just put your curser over the edge of the circle and click and drag your mouse. I took a flash spot out of a guys glasses that i did a head shot for. I retouched about 20 images of him in a matter of minutes.

Monday, June 25, 2007

highlight clipping view button thing

Photo Sharing and Video Hosting at Photobucket
I have hit a very busy workload recently and felt bad about not posting something for those of you that have been following my blog. Here is a neat little piece of info that should help some of you with your highlight clipping.
First and foremost i will just assume that you are shooting raw. If not, slap yourself now as you have been very bad. The advantages of raw far outway the disadvantages, which really are limited to file size in my mind. Rant over.
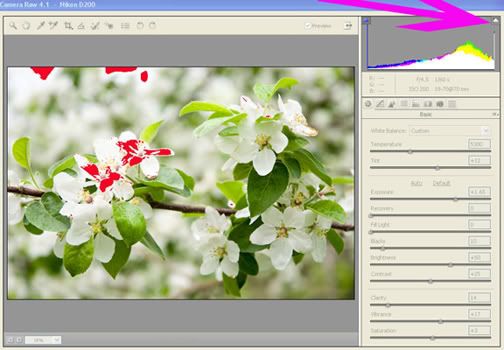
In photoshop cs3's raw plug in (see photo above) there are two little arrows at the top corners of the histogram window. The one on left is the shadow clipping view and the one on the right (see my pink arrow pointing to it) is the highlight clipping view. If you click on this the highlights that are clipped, or too bright, will turn red. This means that these areas are pure white with no detail which may not be the best, especially if they show up in the middle of someones forehead. To bring some detail back to these areas we could lower the exposure slider or even better, move the recovery slider to the right. This is a highlight recovery slider and when you move it you will see the red areas start to dissappear. Too cool.
I will spend some effort in making my next few posts about the camera raw plug in window.

Friday, June 08, 2007

book review

I did not open photoshop today and therefore have no images to show but i thought since i have been making more regular postings to this blog that i would at least put something up tonight. I was at chapters tonight trying to spend a $20 gift card that someone gave me and since there was mostly crap on the shelves i still have the card. I looked through all the photography books (too expensive for what you get), and also all the photoshop books. Cs3 books are starting to trickle out but nothing really good yet.
Here however is my book suggestion list for those of you that need some reading material.
I guarantee that you will learn something from these:
- "camera raw" by bruce fraser (amazing book for learning the raw process, a must have).
- "retouching and restoration" by katrin eiseman (she really knows her stuff and shows it well).
- "the channels book" by scott kelby (channels are very powerfull and very under appreciated).
- "adobe classroom in a book" if you are just learning photoshop.
- "photoshop cs2 studio techniques" by ben willmore (very good overall book)
- "professional photoshop, a guide to color correction" by dan margulis (more than you will ever need to know about color correction)
As you can see, most of these books are on very specific parts of photoshop and i find them much better than the overall photoshop books.
There is also one more that i want to get but i cant find it locally yet which is called "the dam book" by peter krogh which is all about digital assett management (how do you find that photo you took of the kids 4 years ago when you have 100,000 photos in your collection).
Happy reading, and if you have any books that you feel should be on this list then please comment. I have had 584 visitors to this blog so far this year and no comments. You could still be the first, now theres some bragging rights.

Thursday, June 07, 2007

hummer

Photo Sharing and Video Hosting at Photobucket
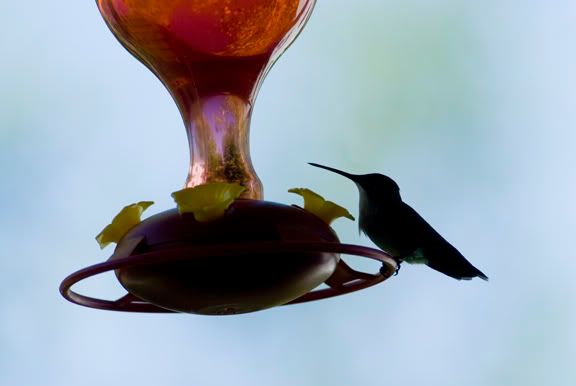
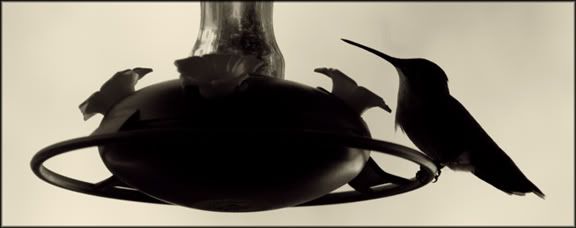
I put up a hummng bird feeder last week and have been looking at it often in hopes to get a photo of the little critter. It is in shade which really give me two options photographically, silliouette or light it. In this shot i chose the silliouette and shot it using a 200mm lens and a 2x converter.
This first shot is the original, shot in raw and opened and saved in photoshop. Nothing else was done to it.
Not sure if i like the photoshopped file better but here is what i did.
I tweeked the raw adjustments a bit more, clicked on the convert to greyscale box first, added more exposure and added lots in the blacks. I also moved the highlight recovery slider close to the middle of the scale to get a bit of the background to show.
I then cropped it and rotated it a bit to straighten the base of the feeder. To rotate it i went to the rotate canvas menu under arbitrary and typed in about 5. I then changed the mode to rgb so i could add some color. I then went under the image menu - adjustments - photo filter and chose the yellow filter. I smart sharpened the image and thats it.
Here is the final image, still not sure what one i like.
Im going to try lighting it this weekend.
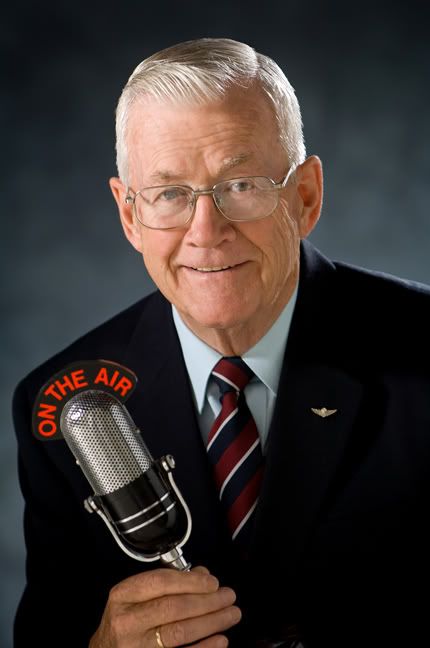
Photo Sharing and Video Hosting at Photobucket