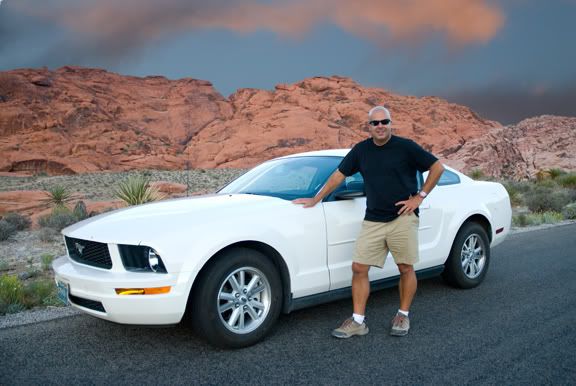
Yes I know, this is an easy one. Could be done in your sleep. I know.
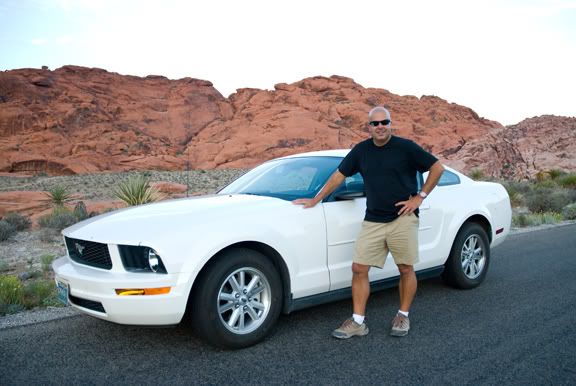
I started by showing you the finished version and if you scroll down you can see the starting image. This is a photo of yours truly just out for a sunday drive in red rock canyon in las vegas. I was there for 6 nights for photoshop world recently and wish i could have done some more exploring.
Anyway, back to photoshop.
This image screamed for a sky. I didn't look far and perhaps could have picked a better one, but this one was in the same folder. I started by selecting the sky, not with the magic wand because that is bad, but with the select - color range command. The secret to this tool is to not just click once in the area you are selecting and then playing with the fuzzy slider. Just like adding to a selection with the wand tool, you hold down the shift key and click around the area you want selected. Then if need be slide the fuzzy stick.
After i had a good selection of the sky i used the lasso tool to deselect the car and my socks as they too were white and got selected. I then hit the refine edge button and expanded my selection so i would avoid the white line on the horizon.
I opened the image i wanted to take the sky from and did a select all, and then hit edit - copy. I went back to my main image and did an edit - paste into.
This placed my paste on a new layer with a layer mask all done. With this top layer selected i could then move it around with the move tool to place it where i wanted it. It looked pretty good but i then just flattened the file and retouched the little parts of the horizon that didnt look so good.
I did a curve adjustment, bumped up the red a bit, and then smart sharpened about 40%.
I would not reccommend a mustang by the way. Stick with volkswagen.

No comments:
Post a Comment