Thursday, November 29, 2007

channel noise

Photo Sharing and Video Hosting at Photobucket
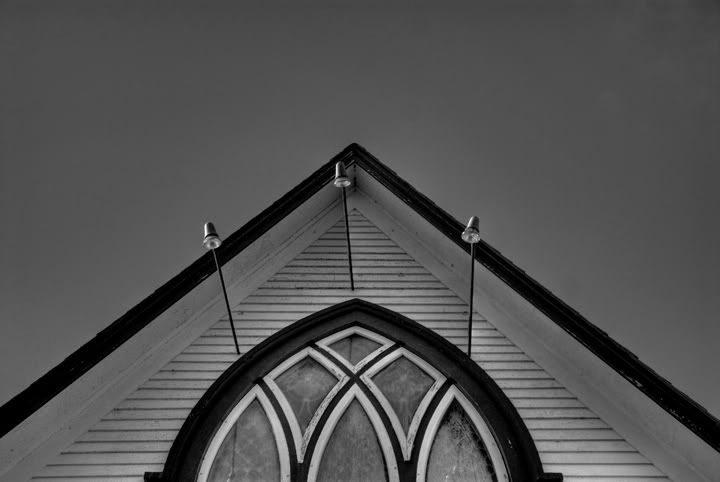
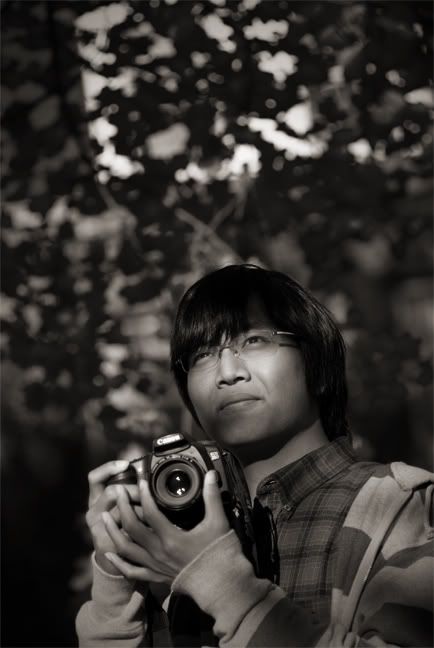
This photo was taken with a nikon d300 camera at 1250asa. Nikon has finally made some good advancements with noise reduction. As a side note, if you dont often need high iso's then just keep your d200's or whatever as you will not see alot of image difference.
I was reading the new napp photoshop magazine today and there was an article on reducing noise on just one channel. It didn't go into a whole lot of detail on the topic so i thought i would play with it a bit.
I started by scrolling through the channels in the channels pallete to see what one had the most noise. Definately the blue channel 9 times out of ten. Funny thing was however was that when i performed what i am going to tell you on the green channel it seemed to reduce more noise overall than the blue. Weird.
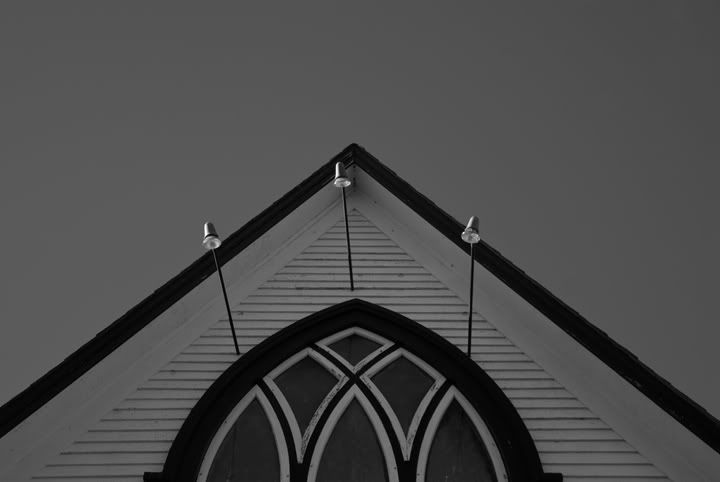
So i highlighted, or clicked on to activate, the green channel and went to the filter menu - noise - reduce noise and used a strength of 10, preserve details 9, and sharpen details 8.
I hit ok and then in the channels pallete clicked on the rgb at the top to view all channels together again. It softens the image just a bit but if noise is the problem then its worth it.
I also added a vignette to the image by going to filter - distort - lens correction, and moved the vignette - amount slider to the left (darken) to about -35, i also moved the midpoint to the left a bit too to make the vignette move in closer to the middle.
I put a black line around the image by simply going to image - canvas size and clicking on the relative box then putting in .2 to height and width. For background color i chose black.
Back to the camera for a minute.
I had the setting on the camera set to uncompressed raw and set at 14bit.
When i opened it in camera raw i opened it in the prophoto space (largest color space).
I made my corrections and then opened it in photoshop.
What you will have to do however if you do this is remember to go under image - mode, and knock it down to an 8 bit image when your done having fun with it in photoshop. You must also go under edit - convert to profile, and set srgb in the destination space if you want to put the image online or send it to a photo lab to be printed.
Sorry on this one to be all over the place.

Sunday, November 25, 2007

photomatix again

Photo Sharing and Video Hosting at Photobucket
I got a chance this weekend to get out and do some personal shooting in a small town not far from me.
It was great to just walk around and shoot whatever appealed to me. I also took the opportunity to do some shots to play with later in photomatix.
The image above was created in photomatix using three bracketed exposures. I have already previously done a post in this blog on how to use photomatix by the way so just scroll through to find more about it.
The settings i used here were strength 100%, color saturation 0, light smoothing - high, and then i played with the white point and black point until i got the look i wanted. I did nothing else to the above image other than smart sharpen 40%.
The bottom image is the normally exposed scene desaturated in photoshop for a comparison.Photo Sharing and Video Hosting at Photobucket

Wednesday, November 21, 2007

bridge slideshow

Photo Sharing and Video Hosting at Photobucket
I have been taking a ton of photos lately but none that i have really done any exciting photoshop work on which is the reason for the slow down in posts.
I did however give a talk on composition and learning to see last night which i accompanied with a slide show set to music.
I wanted to make it as easy as possible so i placed my images in two folders, one for the slide show and one for the photos i used during the talk as examples. I opened bridge and navigated to my examples folder first. I numbered the photos from 01 to 13 so they would be in order as i wanted them to show. I selected them all and then went up to the view menu and down to slideshow options. I set slide duration to manual (the slide would not change until i hit the right arrow key), caption - off, centered, transition - dissolve, and hit play.
After my talk was over i presented my recent work in a slide show. For this i set the slide duration to 5sec, caption - off, centered, transition - dissolve, and i slid the speed of transition slider to almost half. I then clicked the done button as i did not want the show to start right then. I went into bridge and selected all my photos so they would be all ready and then got the music ready.
I cued up the music in itunes. I had two songs which i put into their own library and hit play.
I then immediately clicked back on bridge and went under the view menu and down to slideshow.
Now that they were both running i just sat back and enjoyed it.
I used a laptop plugged into a data projector and also had a set of computer speakers for better sound.
I had timed the amount of photos to the music so that both would end at the same time.
The other nice thing was that i did not have to resize my images (most people would crop them all to 800px x 600px). I just stuck them in the folder as is (some of them were big files) and bridge ran them very smoothly.
I highly reccommend this method in running your next show.
The photo above by the way is just eye candy and has nothing to do with this post.

Thursday, November 15, 2007

a bit of everything

Photo Sharing and Video Hosting at Photobucket
Above is the finished version for a change. You will find out how it started at the bottom of this post.
First i duplicated my background layer.
Then I started with the most obvious problem, usually how i decide where to start an image, which of course was the pavement. I used a combination of the healing brush, patch tool, and clone stamp to fix this up, oh yea, alot of patience also.
When i had that looking ok i retouched out the lights on the building and any other little imperfections i could find. I then did a selection of the sky using the magic wand tool with a very low tolerance, between 5 and 10. I hit the refine edge button and contracted the selection by about 25 and feathered about .6. I then inversed my selection and hit the layer mask button which masked out the sky.
I opened a photo of a sky i wanted to use and then drug the image onto my group photo. I placed the sky layer under my background copy layer so the sky only showed up where my mask was on the layer above it. I moved it around until i got the part of the sky i liked.
I added a curves adjustment layer and a saturation adjustment layer and smart sharpened the file.
I used my burn tool set to midtones and darkened the building and cars down a bit to finish this one off.
Photo Sharing and Video Hosting at Photobucket

Friday, November 02, 2007

toned black and white

Photo Sharing and Video Hosting at Photobucket
I really liked this shot i took last week and have been playing with it to see how it looks best.
I shot it with natural light coming through the trees.
First in photoshop i retouched it a bit with the healing tool and then sharpened it with smart sharpen with an amount of about 60. I then went under edit - adjustments - black and white. When the dialogue box open up just ignore it. Instead of moving the slider in the box put your mouse over the part of the image you want to alter and press down on the mouse button and hold it. You now have a scrubby slider which you can move left (lighter) or right (darker). Take a look in the box and you will see that whatever color your mouse is over is the color that is being affected.
After i had the images tones where i wanted them in black and white, i added a curve and added a bit of yellow and red to the middle of the curve. This just gave me a slight warm, or sepia tone.

Thursday, November 01, 2007

photomatix pro

Photo Sharing and Video Hosting at Photobucket
As i promised a week ago, i am going to give a tutorial on photomatix pro.
If you are new to this software you can see some examples on flickr
(http://www.flickr.com/groups/hdr/pool/).
You can download a free fully functional copy of photomatix pro at
http://www.hdrsoft.com/
the only catch is that a watermark is applied. I would highly advise buying it from them as it is only $99 and you get 60% off if you are a student, teacher, or anyone associated with a school.
So how does it work.
It is a program that merges or blends together multiple exposures to give you a hdr (high dynamic range) photo. This means that you are able to see details in the shadows and highlights which may not be visable in a standard photo.
You can make the image look normal or go a little funky like i did to the building shot up top.
First start by using a tripod and bracketing your scene going from almost white to almost black. I usually take about 10 shots of a scene to then pick out 3 to merge together. Next open the images and save them as tiffs or jpegs (i used jpegs).
Put the three images in a folder that you can navigate to in photomatix.
Now open photomatix.
Close down the windows that pop open and go up to the "HDR" menu and down to generate. Hit browse and find the folder where your 3 differently exposed images are. Highlight all three and hit select. When the generate hdr window comes up hit ok.
A generate hdr options box will come up and check the "align source images" box. Also make sure the take tone curve of color profile (reccommended) box is checked and hit ok.
After it does all the work an image will appear and should look pretty bad. Thats ok.
Now go up to the HDR menu again and down to tone mapping. This is where you make your image decisions.
In the box that pops up just play around with the settings. I put the strength up to around 80 or more, the color saturation up, clicked the third or fourth light smoothing box (cant remember, sorry),and adjusted the white and black points to taste.
Hit apply and your done.
Once you do this a few times you will start thinking about images that would look good with this effect. You will also start carrying a tripod with you, which is something i never did.