I have a job coming up and my client needs a high res file to print 11x17 for a calendar.
No problem. At least thats what i tell them. They dont know that my camera will only capture a file that is 15x10 at 200dpi.
I tried some tests to see how best to add two inches to the height while keeping the dpi at 200.
I tried 4 different methods and its quite hard to tell the difference in a print between them.
What i kept similar in all of them was the way i scaled up two inches. I created an action and went to image - image size.
I went up in half inch increments and changed the mode at the bottom to bicubic smoother each time until i got to 17 inches. This means that yes i went into image size four times and hit ok after each half inch addition. Where i modified the other steps was in the sharpening. I tried sharpening first then upsizing, tried upsizing then sharpening, and lastly tried opening my raw file as a 16 bit prophoto file, upsizing, sharpening, converting to adobe rgb98, mode to 8 bit. For all the extra effort i cant really tell a difference. The file that looked the worst however was the one i sharpened first then upsized.
I now have the word out to sell my d70 camera and am ordering a d200 very soon. Dont tell my wife.
Thursday, April 27, 2006
Monday, April 24, 2006
lens baby
Just a quick note to let you know that if you are a student or educator you can get a much better price on a lens baby. Just go to www.lensbabies.com and order direct from them. We have one on order and cant wait to play.
Friday, April 21, 2006
layer masks
Another blog requested by the paperboy.
Layer masks are a great way to blend images and do local tonal range adjustments.
If you have an image open just drag the background layer down to the create new layer icon in the layers pallete to make a copy of it. Now if you look at the bottom of the layers pallete, the third icon from the left is "create layer mask".
Click this and you will see the mask appear on that layer in the layers pallete.
You now use a paint brush with black ink to hide that layer that the mask is on.
If you make a mistake with the black just paint it back in with white ink. Obviously if the bottom layer is the same as the top this mask will acomplish nothing. Select the bottom layer and do a curve adjustment on it. Now when you paint with black in the mask you will see the underlying layer show through.
Remember that you can use a brush with a low opacity to show through lightly.
You can also apply a gausian blur filter to the mask to blur it.
Friday, April 14, 2006
orchard
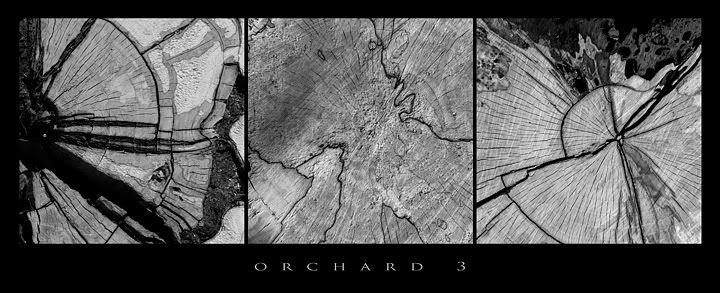
Its funny how you can find a place that just seems to enlighten you.
My son and i walked through the apple orchard today and there was nowhere else i would have rather been. I will be going back often and will have many photos to post.
Thursday, April 13, 2006
old photo site
My buddy the Guru just posted a cool site.
http://westfordcomp.com/updated/found.htm
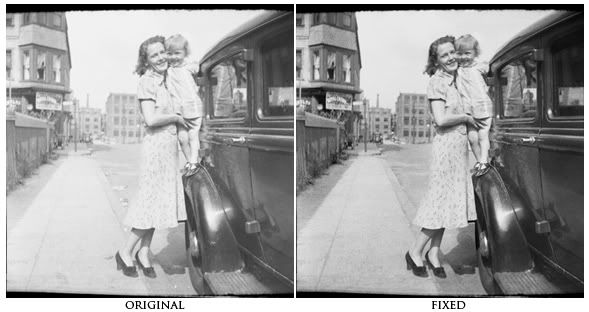
I enjoyed looking at it but at the same time noticed how badly the images were in need of some photoshop work.
I thought that it would be a perfect place for photoshop students to find images to practice on.
I am showing one here I downloaded and worked on for a minute.
I corrected the contrast (via a curve of course), retouched it, used the burn tool set to shadows to darken up the background buildings and sidewalk, and sharpened it using smart sharpen.
Try one, its addicting.
Tuesday, April 11, 2006
feather viewing
Just a quick easy tip tonight.
If you want to apply a feather to a selection to soften the edge you would go to the select menu and down to feather, enter the amount of feather you want and hit ok. The trouble is that you can never tell how much it will feather because it does not give you a preview. If you want a preview just go to quick mask mode (q) after you have set your feather and you will see what affect it will have.
If you want to apply a feather to a selection to soften the edge you would go to the select menu and down to feather, enter the amount of feather you want and hit ok. The trouble is that you can never tell how much it will feather because it does not give you a preview. If you want a preview just go to quick mask mode (q) after you have set your feather and you will see what affect it will have.
Monday, April 03, 2006
autostitch
Some of you who like to stitch photos together using photomerge or the crazy people who do it manually, may be interested in this post. You can download a free stitch program (windows only) at
www.autostitch.net
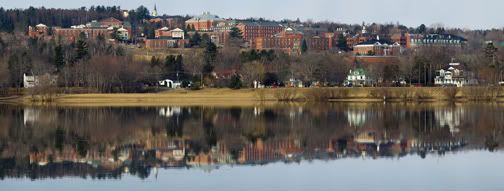
By default it creates quite a low res file. If you go into edit - options however you can change the size to 100% and jpeg quality to 100. Then all you do is go to open and select the jpeg files you want it to stitch. Hit ok and it does its thing. Very easy and extremely accurate.
The sample i am posting is made up of 26 images that were shot vertically and handheld. I retouched the sky and water a bit but only for objects that were in the original photos and not for any problems the software had.
www.autostitch.net
By default it creates quite a low res file. If you go into edit - options however you can change the size to 100% and jpeg quality to 100. Then all you do is go to open and select the jpeg files you want it to stitch. Hit ok and it does its thing. Very easy and extremely accurate.
The sample i am posting is made up of 26 images that were shot vertically and handheld. I retouched the sky and water a bit but only for objects that were in the original photos and not for any problems the software had.
Subscribe to:
Posts (Atom)