Wednesday, September 30, 2009

combo

Photobucket
I am in the mood to shoot some portraits. Why i have no idea.
Until i get some shot i thought i would play with a couple photos i took last month.
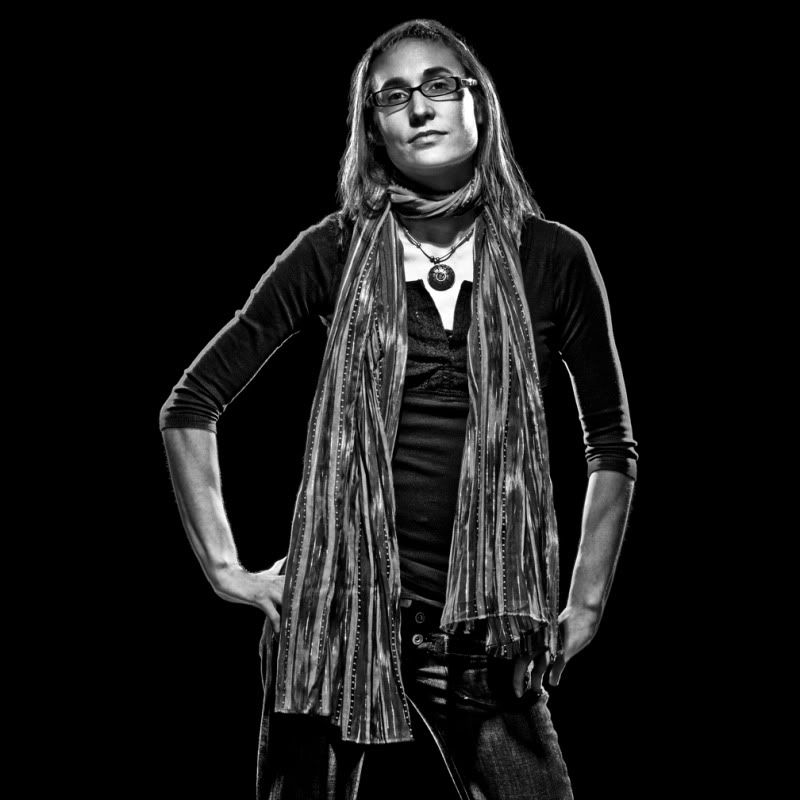
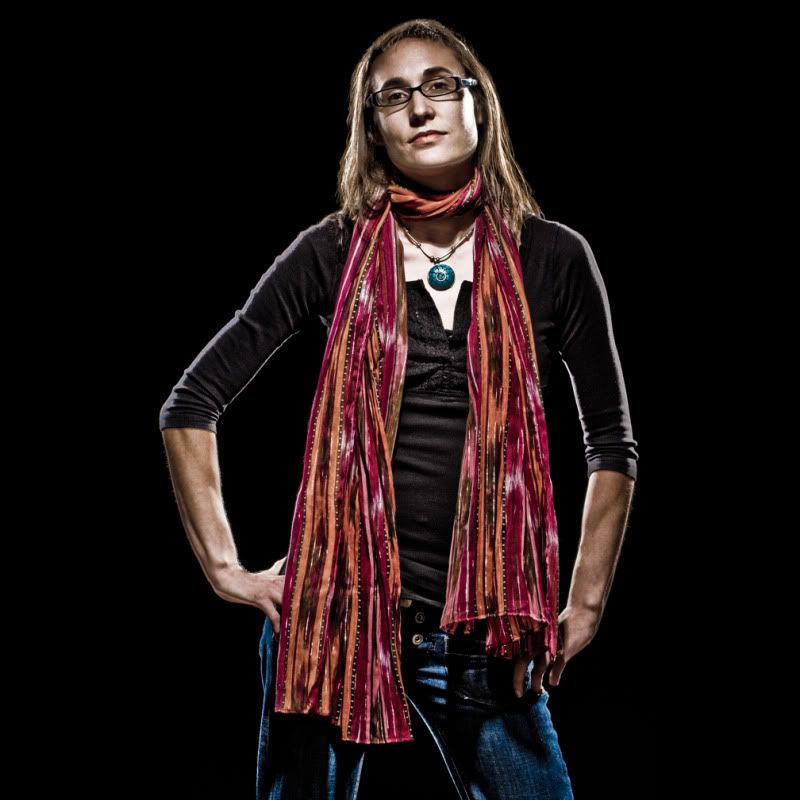
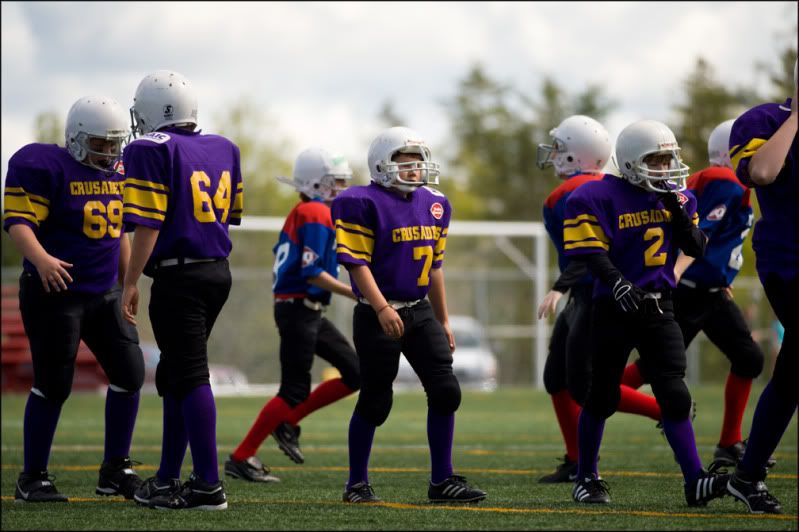
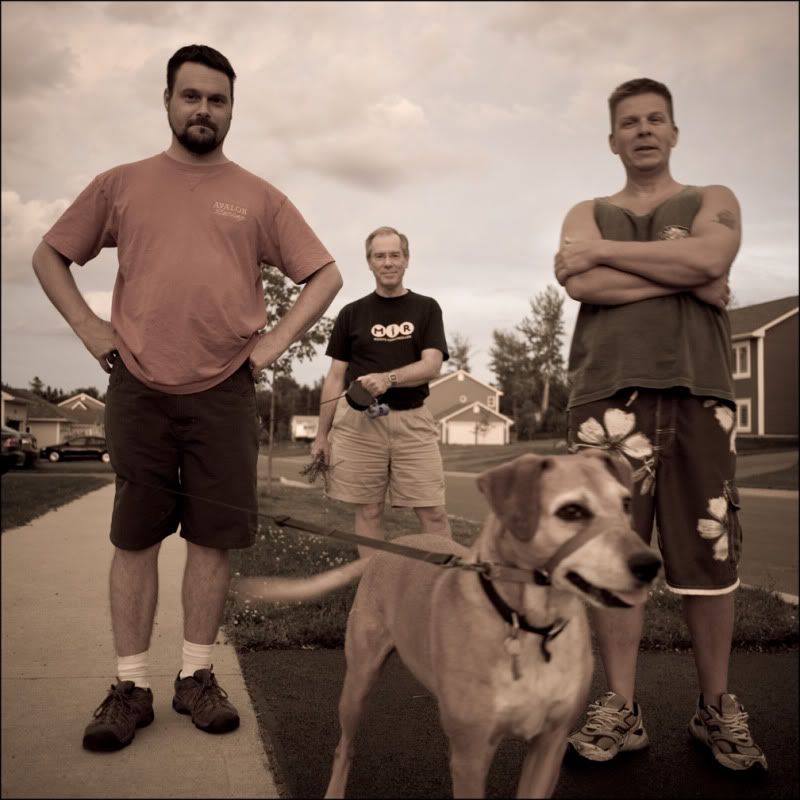
With the photo on the left i used the dodge and burn tool, mabey a bit too much.
To up the contrast a bit, with both photos i created a new layer and converted it to black and white. I did an adjustment and increased the contrast by dragging the white and black sliders three squares towards the center. I then changed the layers blend mode to overlay and decreased the layers opacity down to 15%.
I also did a vignette on both photos seperately.
The photo on the left was shot with available light and the photo on the right used one off camera flash placed to the left and aimed direct. The right hand photo was shot around noon.

Tuesday, September 29, 2009

cool location

Photobucket
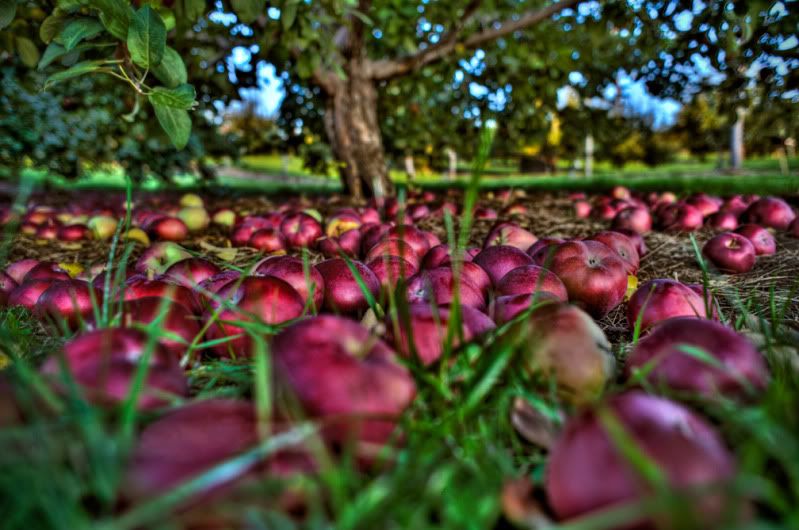
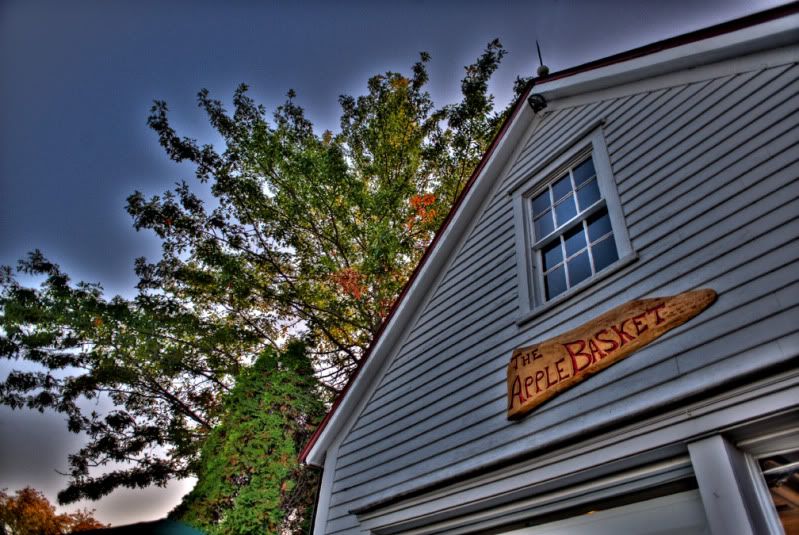
My family went apple picking tonight at a place that i have never been before. I thought it was incredible visually and ended up shooting the whole time and not picking one apple. My daughter and her friend just ate and threw them at each other so i guess it was my son and wife that did all the work. Fitting as the two of them later made an apple crisp that was great.
I just combined three images here and ran through photomatix.
Below is another one, since i missed a couple days of posts.
I just did the exact same thing to this one also. I also did a curve to warm it up a bit. My little trick to do this is to add yellow and magenta to the shadows on the curve. I also did an apply image to put green info into the weak red channel.
I will go over this approach in detail soon as it works great for fall shots.
Photobucket

Friday, September 25, 2009

inspiration reworked

Photobucket
I rarely rework an image but thought i would try this one in black and white.
Not sure which way i like it better, both ways i guess.
I went to a wonderful photography art exhibit opening tonight.
Congratulations to all of those in the silverfish group.

Thursday, September 24, 2009

pita pit

Photobucket
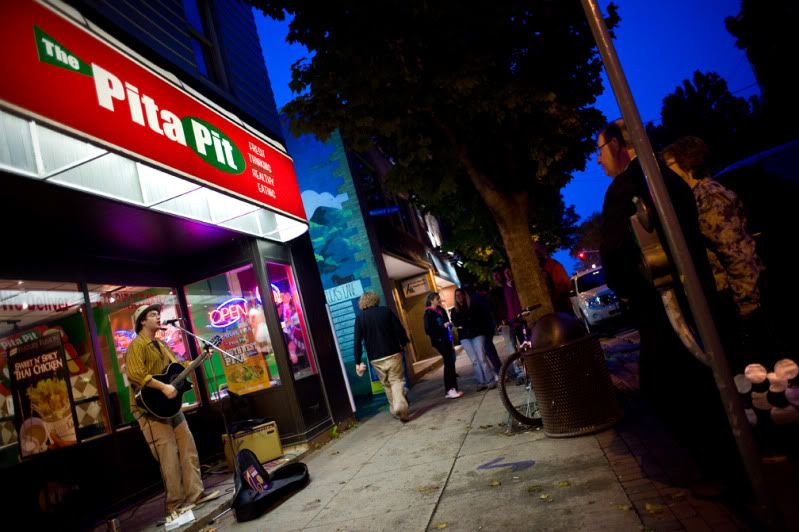
This is another image i took at the jazz festival. This one is straight up. No fancy process and nothing other than a curve correction and sharpened. Shot at iso 1250 f2.8 1/40sec with a 24mm lens.
Tired, must go to bed.

Wednesday, September 23, 2009

inspiration

Photobucket
First of all, yes i know, this is not a photo of a car.
I did look around for one, and found one, but thought this was a much better shot.
This shot gives me the opportunity to talk about inspiration and why we take some of the photos we take.
Sometimes its little things that spark an idea for an image. Today it was this scarf. I have seen the scarf before though, many times in fact, so why was it today that i wanted to photograph it. My guess is how it showed on the black outfit. It was the only source of color, other than the necklace. That was the "what" of the photograph. The "how" of the shot was the lighting and the photoshop high contrast look. All of this was included in the initial spark of inspiration. I saw it as a final image and in the end that is exactly how it came out. I am not saying that i have this great eye or anything as i am sure that many of you that read this post previsualize images in the same way. Sometimes we dont see it all of course and have to play for awhile to finish off the image. Another good thing to do it to "live with it" for awhile. Keep it on your computer screen or stick up a print and each time you walk by just take a quick look. You will start to get some ideas and also will probably notice some problems with the photo that you didn't notice to begin with.
So to end the inspiration speech my advice is to listen to it when it hits you and act on it. I have way too many photos in my head that should have been but i walked by them.
I lit the image with two strobes behind her and placed to the right and left for rim. I used one light for the main and placed it high and directly in front of her. All lights were direct and shot through a 30 degree honeycomb grid spot.
In camera raw i took the recovery, contrast, clarity, vibrance, and fill light to 100 and took the saturation way down. I upped the blacks and exposure to increase contrast even more. I then just retouched the image a bit and hit the scarf with the sponge tool set to saturation.
To finish the image off i extended the canvas size on the width so i could crop to a square. I sharpened pretty heavy also.

Tuesday, September 22, 2009

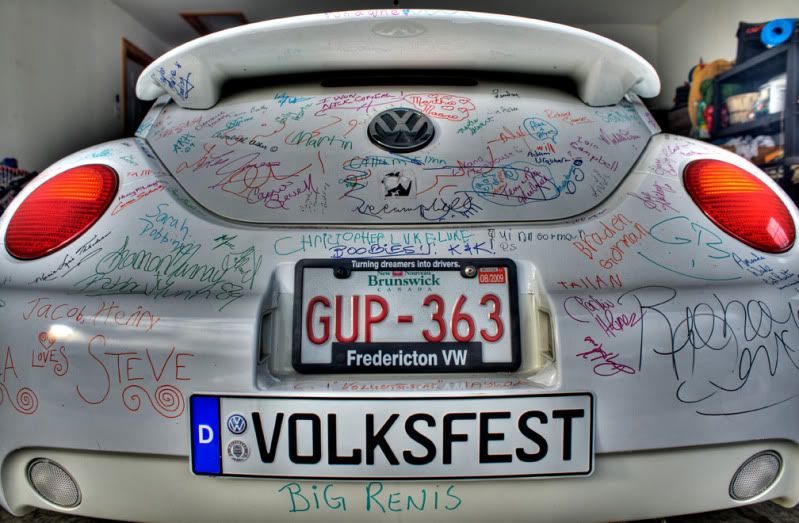
sign the bug

Photobucket
I never know what car i will find in my garage. Tonight it was a bug that was used at our local jazz festival to raise money for music in schools. For the small donation of two dollars you get to sign the bug. Pretty cool idea and obviously it looks like they did quite well.
I used a tripod here and bracketed over a nine stop range. Blended 5 images together in photomatix.
Thats all.
I should try to find another car for tomorrows post. Just to keep the theme going.

Monday, September 21, 2009

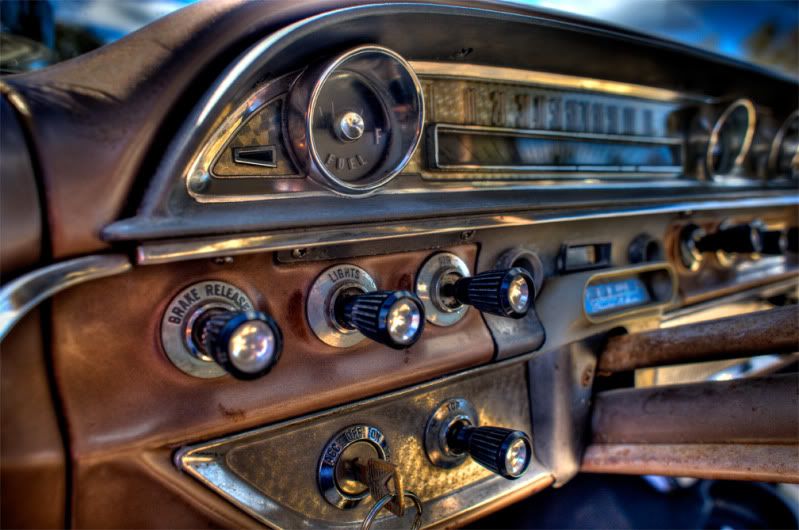
old ford in hdr

Photobucket
I shot a wedding this past weekend and i was very excited to see the car that would transport the couple from the church to the reception. I looked inside and knew that i wanted to try to get a minute to do some bracketed shots to play with later. This was shot handheld and three shots were blended together in photomatix. The only other thing i did was sharpen and do a contrast and color correction curve.

Sunday, September 20, 2009

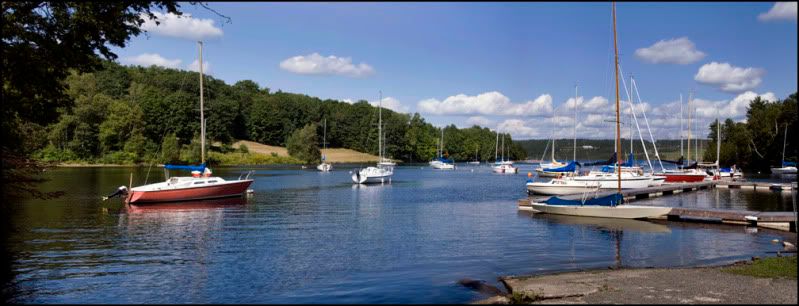
guest blog sunday

Photobucket
My first guest blog entry, i am proud to say, is from my father.
He has taken a keen interest in photography over the past few years and is doing extremely well.
Judging from the amount of full slide trays stored in the basement closet at my parents house, this isn't a new passion.
The image you see above was taken at a local park (centennial park) and placed 1st in a provincial government photo contest. He has now entered two photo contests and has placed first in both.
And i thought i got my eye from my mother. Not so sure now.
This is a pano made up of three images and stitched together using photomerge in photoshop.
The images were shot at f8 1/640sec and iso 200 on a d90 nikon.
Thanks dad for sharing this image with me and the people who check in here once in awhile.
I know there will be many more great images to come.

Saturday, September 19, 2009

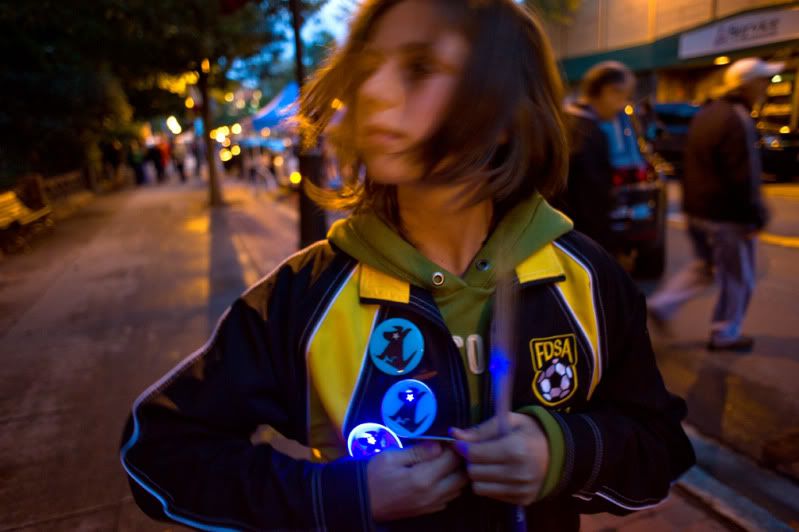
lights and color

Photobucket
Sometimes you dont really know why you like a photo but you just do.
I think in this case its the movement and color for me. I dont even mind the flare in the face.
I really did nothing to this image in photoshop, just adjusted the sliders in lightroom develop module.
I shot the photo at f2.8 1/25sec and iso 1250.
Tomorrow you get to enjoy my first ever guest blogger.

Friday, September 18, 2009

jazzy photomatix

Photobucket
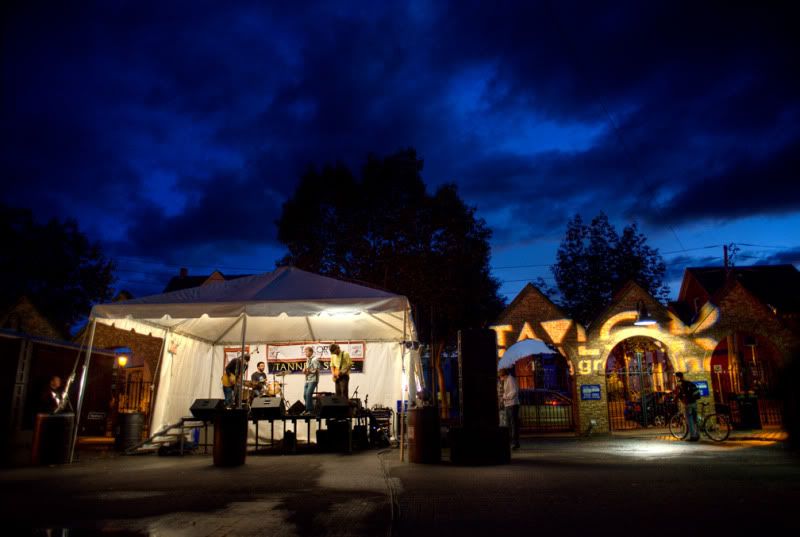
We have an annual jazz and blues festival in my little city which i was fortunate enough to wander around at tonight with my family. This was the first time we took the kids and they loved it. I threw my camera around my neck with a 24mm lens just in case i saw anything of interest. I saw alot.
This was an outdoor stage and the sky above was great. My camera was set to auto white balance (which it always is) and it corrected for the tungsten that it saw under the tent, which made the sky a really nice blue. I was shooting at pretty high iso, but thought i would try a hdr shot anyway, handheld. I bracked 5 stops and chose three to blend together in photomatix. I did a couple curves and sharpened.
The only thing that did not turn out was the band under the tent. Where they were moving they turned out all funky. To fix this i just opened one of the original images and drug it on top of the hdr version. I selected both layers and hit edit-auto align layers. I then created a layer mask and masked out everything except under the tent.

Thursday, September 17, 2009

royal canadian mounted police

Photobucket
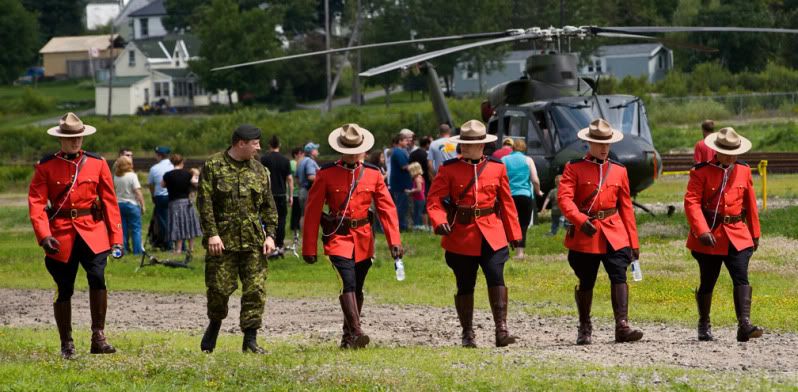
I was looking at my blogs stats tonight and coulden't help but notice that I have people linking in from all over the world but very few from right here in canada. On my journey through my lightroom catalog for a photo to post i found this one from new brunswick day.
The rcmp, i think, are well respected around the world and they wear really great dress uniforms {different from the everyday ones}. Thus my reason for picking this photo for tonight.
In photoshop i did a curve to adjust color and contrast and then used the desaturate tool set to about 20% and painted over the grass in the foreground and the trees in the background. This helped really bring your eye to the main subject and make them pop out of the frame a bit. I then used the saturate tool and hit the red jackets just a bit. Try this method sometime. If you do a before and after you will really notice a difference.

Wednesday, September 16, 2009

adding flash outside

Photobucket
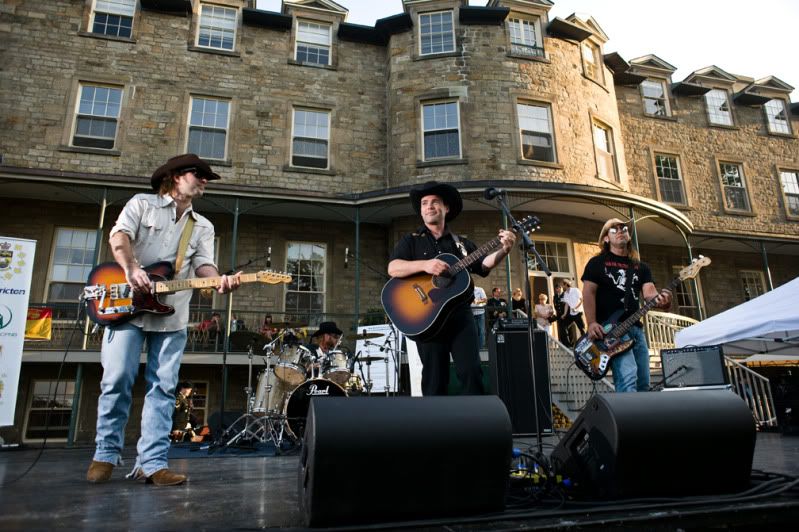
I seem to add a little touch of flash anywhere and everywhere these days. I have always liked ambient light photos but i find it rare that the ambient looks good when its a photo that i want to take. This image would be a prime example. The bands faces were in shade here, well mabey they had a bit of setting sunlight on their right sides, but nothing on their left.
I put a sb flash at the front right hand side of the stage and one at the front left. I just adjusted the power on both so that the left was brighter than the right and also set so that i could get the building behind them captured at under a 1/250 sec shutter speed (my cameras fastest flash sync). You definately dont want to set both flashes at the same power. This gives flat boring light, called copy light. Use it for artwork or copywork or large group photos (actually for groups move the lights more to the front and set them up nice and high). I always use my flashes on manual unless i have them on camera and am bouncing the light off a ceiling or something. I just adjust the power up or down a bit at a time and take a photo to see how it looks. Too easy. After awhile you can get a really close guess on the first crack.
I set off the lights with pocket wizards which i highly recommend you purchase at some point, or something like them, to get your flash off camera.
In photoshop i cranked up the clarity and upped the contrast by the method i have talked about in previous posts. I sharpened and was done. I did not use the clone or heal tool once on this image which could well be a first for me.
I tested this image as a black and white also and i really liked it.
The band by the way are "the hardcore troubadours".

Tuesday, September 15, 2009

liquify plus lots more

Photobucket
I have had the models permission to use this photo on my blog for some time now but just didn't have the energy to type about everything i did to this photo.
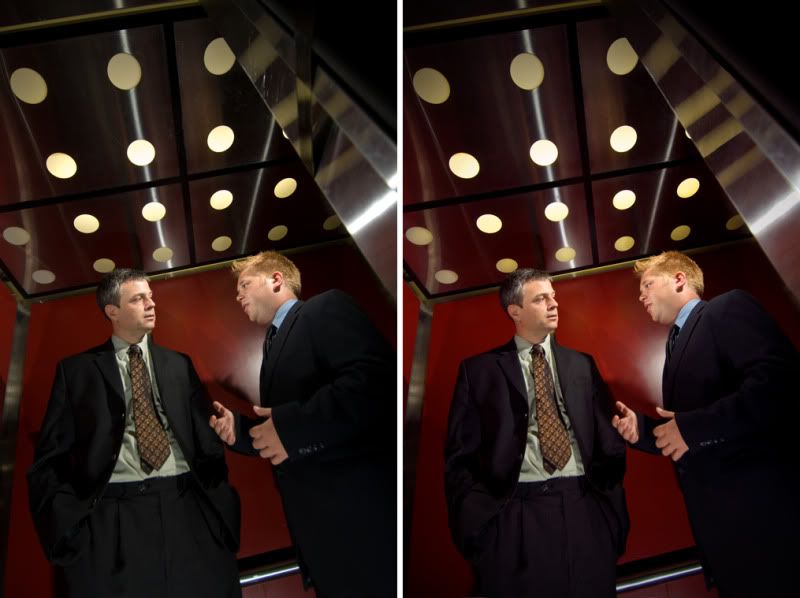
On the left obviously is the original and on the right is the retouched version.
Lets start with the concept. Two business professionals in an elevator. One has 60 seconds, or the time it takes the elevator to get to its destination, to sell the other on his idea. Cool.
We will now move on to how i saw it photographically. I started with a tour of the elevator to get my head around what i would do. I then sketched out a lighting diagram and in the end almost stuck to it. The wanted room at the top for some text so i decided to stay low and shoot up to get the lights in the ceiling. The elevator was pretty tight so i used a 12 - 24mm f4 lens. No, if i lay on the ground and shoot up at 12mm it wont distort anything, like waists or hands, no.
I moved next to the lighting. I considered my main light the one i placed high to the right side and aimed at the guy on the left. It gave nice light on him and a hair light for the guy on the right. I then needed to fill in the guy on the rights face so i put a light on the left hand side, zoomed in the head, on both flashes i think, and aimed it at the right hand side guy. With both flashes fairly high and zoomed in, everything from the waist down was black. My original intention was to stick a third flash on the floor and aim it straight up to give a splash of light on the back wall. I changed this idea and moved the flash out to the front of the elevator, set on the floor, and aimed it at their legs. It did cause some weird shadows on the back wall but i retouched them out later. I just set my shutter speed to the setting that put the ceiling lights at the brightness i wanted them. Easy.
The shoot was easy that is, the retouching took some time.
I started the retouching by removing the duct tape i had holding the elevator door open on the right of the photo. This took the most time. I also touched up any other little imperfections on the elevator walls and any shadows i did not like. Just used the healing tool and clone tool for this. I then used the liquify tool to shrink the guy on the lefts waist and legs and the guy on the rights hand in the foreground. This worked really well.
I did a few curves and sharpened. I added a vignette and i think that was all i did.
I was very happy with the outcome and thought it was worth the time invested.
Looking back at the photo now i realize that i should have shrunk the guy on the rights lower half a bit too.
Monday, September 14, 2009

photomatix interior

Photobucket
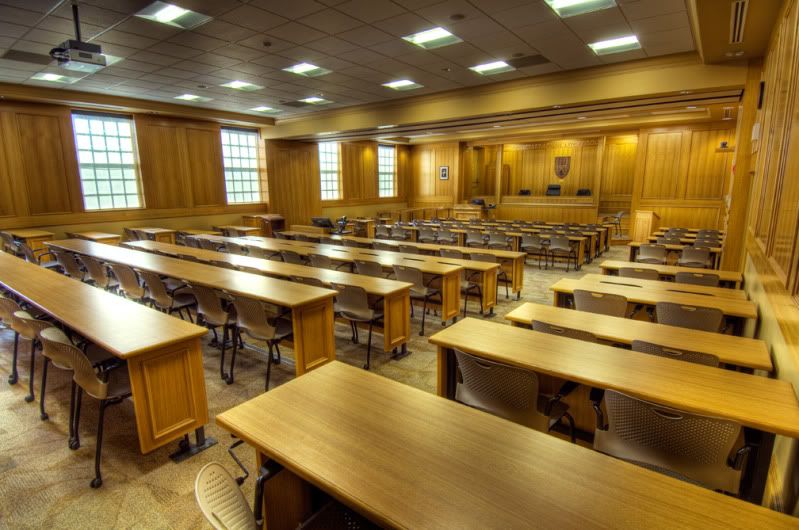
Photomatix is amazing, i really like it.
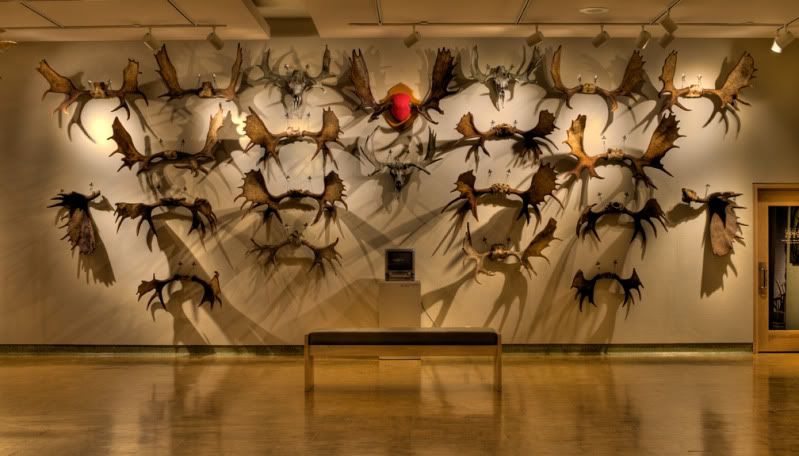
I had to shoot this room and the light was all over the place. It is all wood so if i had lit it i would have had reflective spots all over the place i am sure. It was a big room as well so how much fun would that be to light.
I had daylight coming in from the large windows and had spotlights on the sign at the far wall plus all the overhead lights to balance out. Photomatix did a great job. I bracketed over a 9 stop range and chose 5 of the images to blend together in photomatix. The color didn't come out all that great but that really dosen't matter. Just try to get the blacks and whites looking decent and then dump it into photoshop. You can open the file in camera raw and adjust there or just do a curve like it did on this one. I sharpened and that was really about it.
I have used this approach many times now and for the most part it works. Remember to use a tripod and a low iso.

Sunday, September 13, 2009

slow day

Photobucket
A slow day today is an understatement. I went to my sons football game and then sat in a lawn chair for the rest of the day.
I havent been taking many photos lately that i can post. I have a couple in the cue that i am waiting for permission on but other than that i dont have much to post. Looks like i will have to take the camera for a walk and get some new stuff to get me through the month.

Saturday, September 12, 2009

protection

Photobucket
Just a very light post tonight.
I thought everything about this photo said protection. I like the way the focus is on the main subject placed in the center of the frame. I used the creative aged photo preset in lightroom to give it the look it has.
I have a story brewing about this shot but am tired and it is not coming together fully.
I will try to add to this one tomorrow.

Friday, September 11, 2009

last of the 1.4s

Photobucket
This is the last shot i took while i was shooting outside the other night.
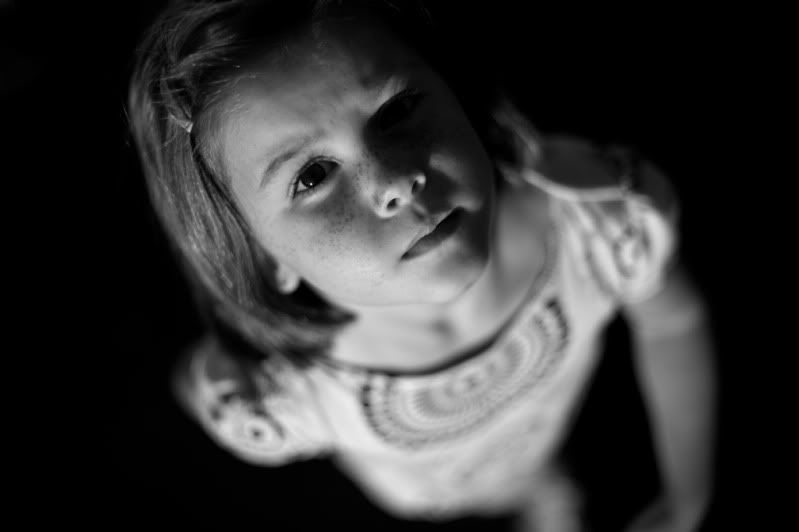
I put the camera on "auto area AF (auto focus)" and held it above her in my outstretched hand. The camera did an amazing job on the focus. The black background is my paved driveway.
The only thing i did in photoshop was lower the saturation to 0.
Tomorrow i start posting my f2.0 portraits, kidding.

Thursday, September 10, 2009

another f1.4

Photobucket
My son is amazing. No two ways about it.
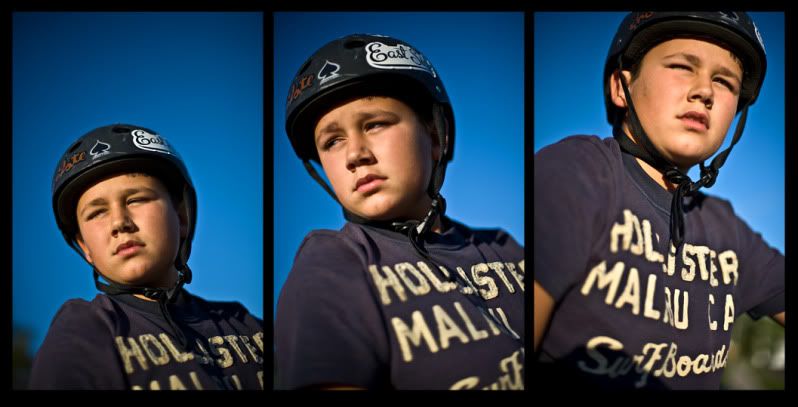
This is only one example. Last night as i was shooing my f1.4 portraits he had a headache, a very bad headache. He still however gave me two minutes to take his photo with no complaints at all. After a trip to the doctor tonight it turns out he has an ear infection. Ouch.
I really did nothing to these images in photoshop. Just placed them all on a new canvas to show them together.

Wednesday, September 09, 2009

f1.4 portraits

Photobucket
I had an unexpected night off tonight. No work planned just my sons football game. He had a nasty headache however and halfway through putting on his gear we decided that several blows to the head on the field may not be a good idea.
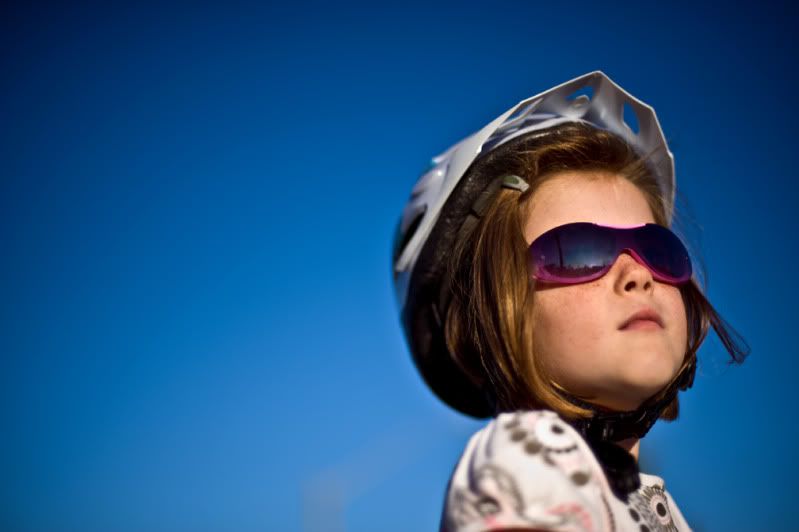
I took to the streets with a 50mm f1.4 lens, my favourite by far, and a freshly formatted 4gb card. It was later in the evening and the sun was going down and as the kids rolled by on their bikes i noticed how the light was hitting them. I decided to first of all lay in front of them so they could not go anywhere and then shoot at an upward angle as to just get sky in the background. I did a little series and this is the first one i will post. I shot it at iso 100, f1.4 and 1/8000 sec.
I only did a little bit in photoshop. I cranked the clarity up to 100 (in lightroom) and just retouched some highlights out of the sunglasses. I played with a curves adjustment layer quite a bit until i got the contrast and colors how i wanted them. That was about it.

Tuesday, September 08, 2009

bonfire flames

Photobucket
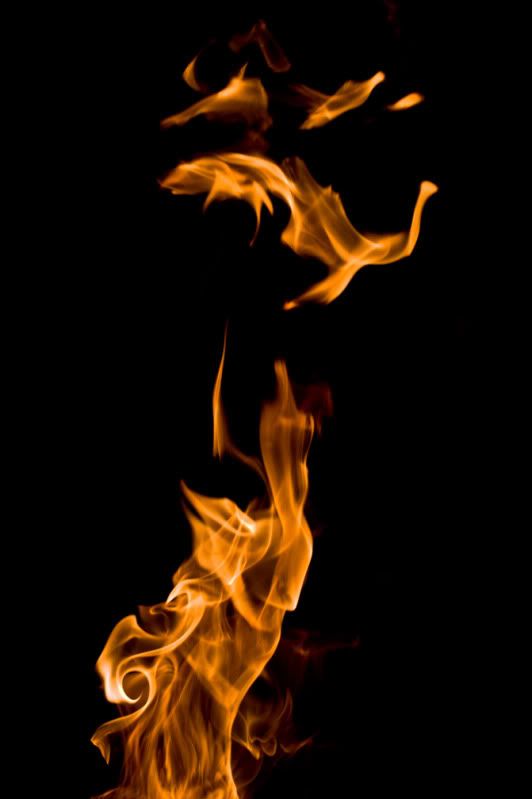
Lets set the mood here to start. Its friday night after a long work week. The street is quiet. Dark settles in. My fire pit sparks to life and the sweet aroma of burning hardwood travels from house to house. Doors start to open and out filters friendly faces carrying lawn chairs, hot coffee cups, and snacks to share. This event, luckily, happens frequently.
I thought i would try a few shots of the flames while sitting there staring at them and was quite surprised at the results. The patterns the flames create were amazing. I did a series, all shot from the same point and had planned to try to do something with them but never did.
I shot this image at iso 400, f4.5 and 1/1250 sec with a 50mm lens.
I will try a bunch of shots sometime at different shutter speeds. Might be interesting. Cant wait till friday.

Monday, September 07, 2009

missed shot

Photobucket
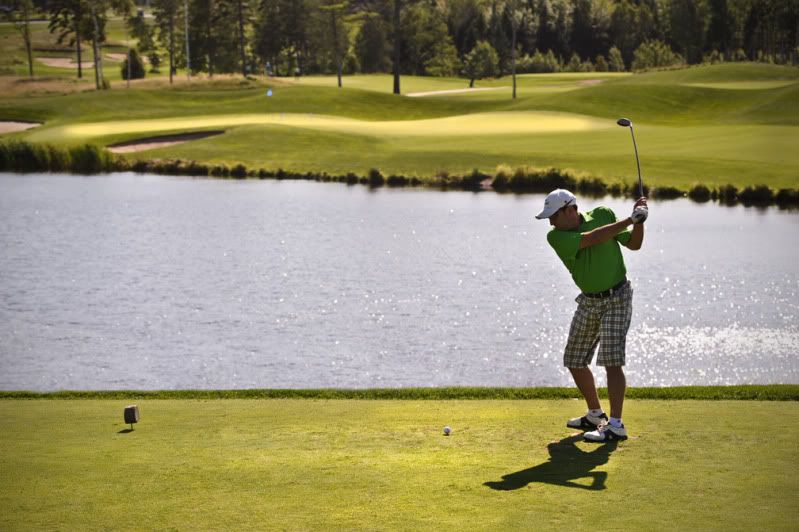
I am not talking about the golf shot in my title but the fact that already, three days into my little self challenge of posting one shot a day for the month, i have missed a days post. Last night in my defense was beautiful outside and all the neighbors got together for a bonfire and fireworks for the kids last weekend of summer vacation. We stayed out till well after midnight and thus the missed post.
The photo above is from a recent golf game and i ended up doing a fair bit to the image in photoshop. The tee box was battered to say the least when i started. Five minutes later with the heal tool and the box looked pretty good. I removed a bunch of grass sticking up on the grass edge in front of the golfer, my partner for the round. For this task i used the clone tool. I then played with the dodge and burn tool on the distant shore and was done.
This shoot was the second time i have ever shot jpegs with my camera. Lightroom made it nice to work with them though. The only trouble i had was correcting the color in the image. All the green threw me and although i am still not sure how i would have made it better, i am sure it in fact could be better.
It was my intent to keep the image a bit on the dark side. I wanted my dodging on the far green to show as a light point, as well as a little dodging around the ball.

Saturday, September 05, 2009

room shot with tech

Photobucket
Not much time to talk as it is three minutes to midnight and i am still on the goal of one image a day for the month.
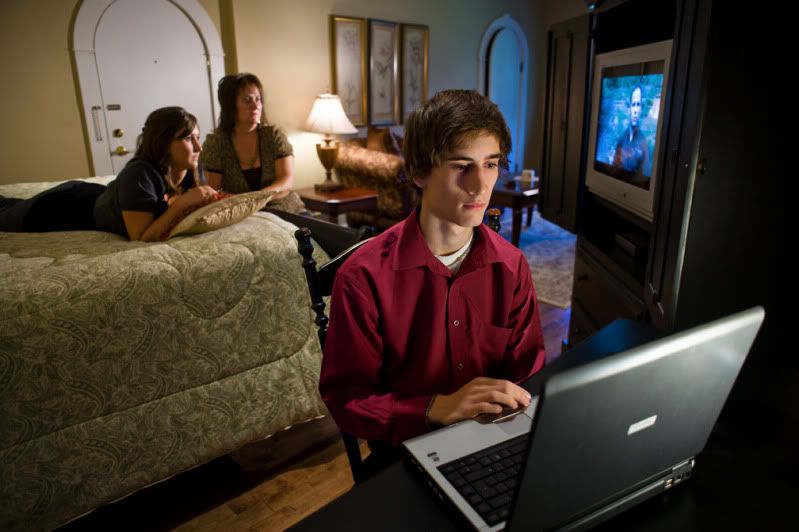
This was a really, really cool inn that i would guess not too many people have ever heard of.
I used two sb flashes. One was just laid on the table to the right of the laptop and bounced off the wall back on to the guy in front. The second flash was hidden behind the tv and aimed at the two girls in the background (zoomed in the head also). I had a full cto gell on each flash and had the camera white balance set to tungsten. You can see some blue in the background right hand side which was caused by a window being back there (i liked it though). Shot with a 24mm lens, f3.5 at 1/15 sec hand held and iso 200.

Friday, September 04, 2009

photo of the day

Photobucket
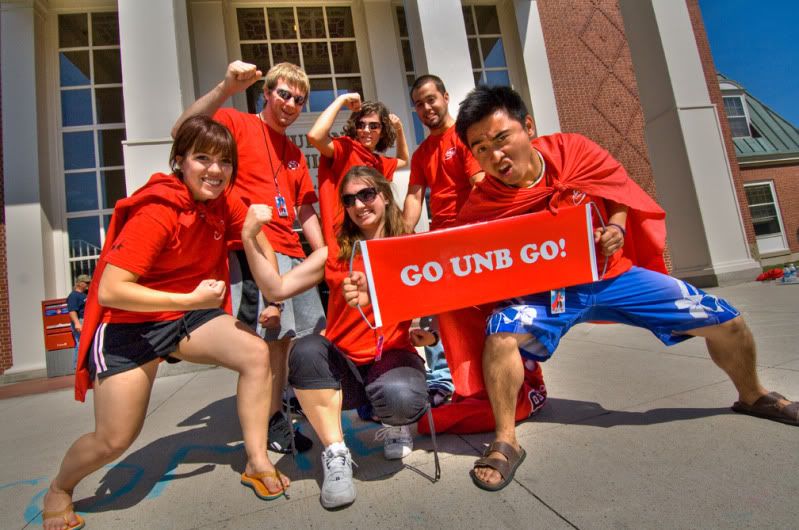
I shot this image a couple days ago as students were moving back onto campus. I just asked them to get close together and give me something cool and this was their result.
I took the image into photomatix and funked it up a bit. I then blended this result with the original image to lessen the photomatix effect a bit.

Thursday, September 03, 2009

one photo a day

Photobucket
I am tired tonight, very tired. Mabey thats why i had this crazy idea to post one photo a day to this blog all this month. I am planning to talk about some and not others.
Being a photographer i get to see alot of stuff. By posting more often my hope is that you get to see slices of what i see.
This may not end up being that exciting but i will try hard to make it at least worth the 30 seconds or so you may spend here.
For some reason, this past monday, i had 106 different people visit my blog. Thats not a record but i just thought it was strange as i had not posted in almost two weeks.