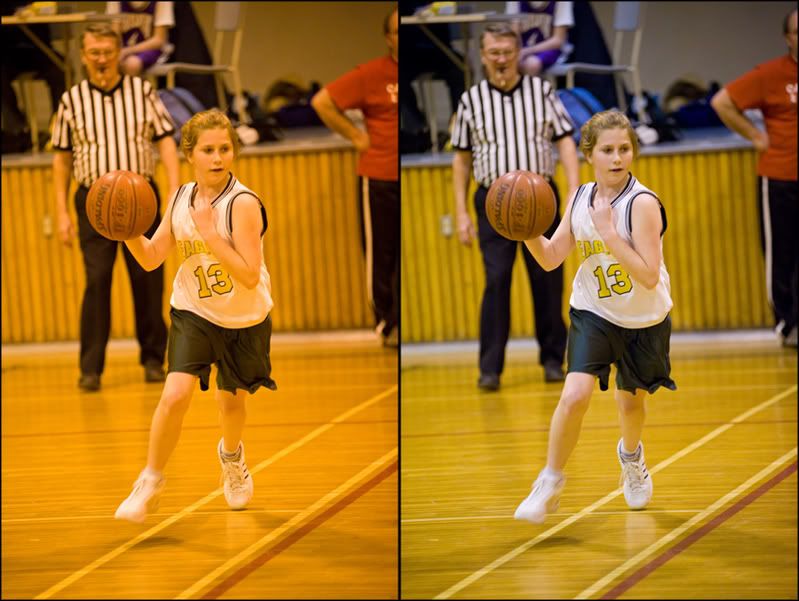
I of course realize that everyone out there, especially those of you that follow my blog, is shooting in raw mode. Not because you get thousands more levels of grey and that you end up with an umcompressed image file but because i suggested that this is the mode that you should use. Ha. That was an attempt at humor.
Ok, i was shooting in a horrible gym tonight, lighting wise anyway. None of my white balance settings came even close so i set the camera to "degrees kelvin" and set it to the lowest number it goes to, i think it was 2500 degrees k. The photo you see above on the left is what that looked like. I only opened the image photoshop, shrank the image size and saved it. So, if i was shooting jpegs this is the file i would be faced with color correcting using either levels or curves. If i took 200 photos during that game i could fix the first image and then drag its curve over onto all the other images, which i would have to open in photoshop and then flatten and save. Or make an action and do a batch.
The image on the right was corrected in the camera raw plug in very easily by using the white balance tool and clicking on part of the white uniform. I did a few more slider tweeks like raise up the recovery slider and the blacks while lowering the exposure. I could then just select all my other photos in the camera raw plug in and hit the synchronize button and then the done button. I could have my 200 images color corrected faster that you could read this blog post.
For a little added info, i was shooting on a d700 set at iso 3200 with an 80-200 f2.8 lens. The exposure was 1/180sec at f2.8.
1 comment:
i like your blog......
Post a Comment