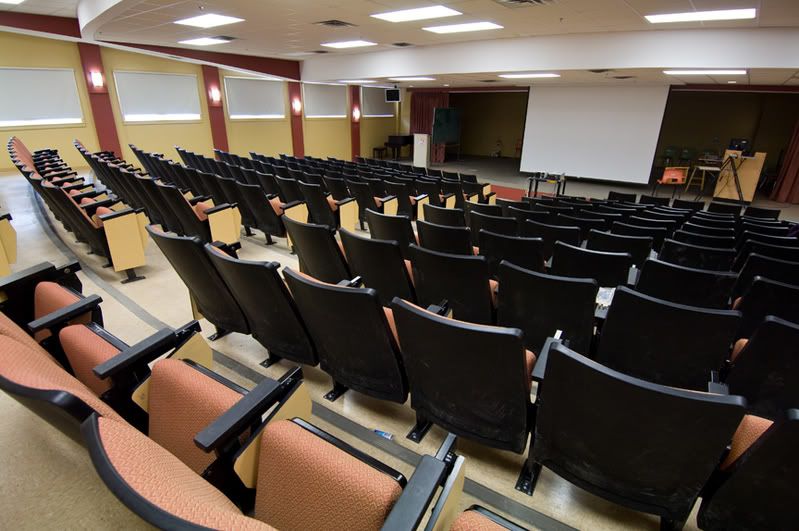
Above is the original image, shot in raw, processed in camera raw plug in and then saved.

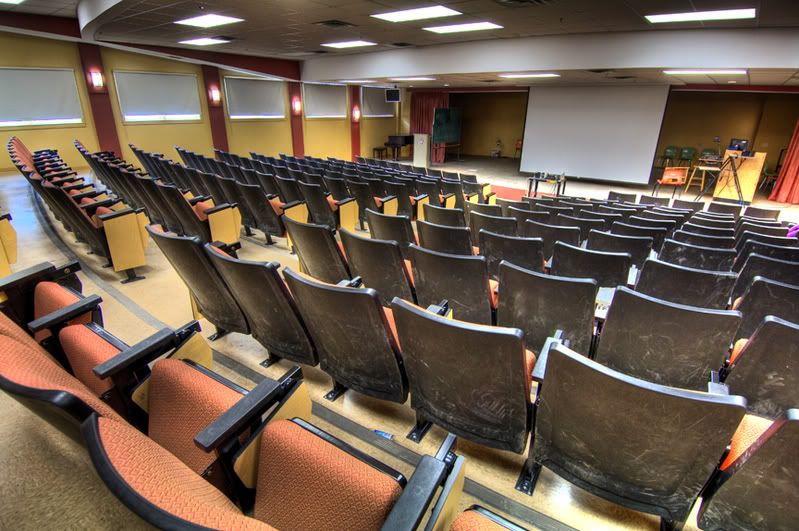
This second image was made from three different exposures, one dark, one middle, and one light, which were then run through photomatix and saved.

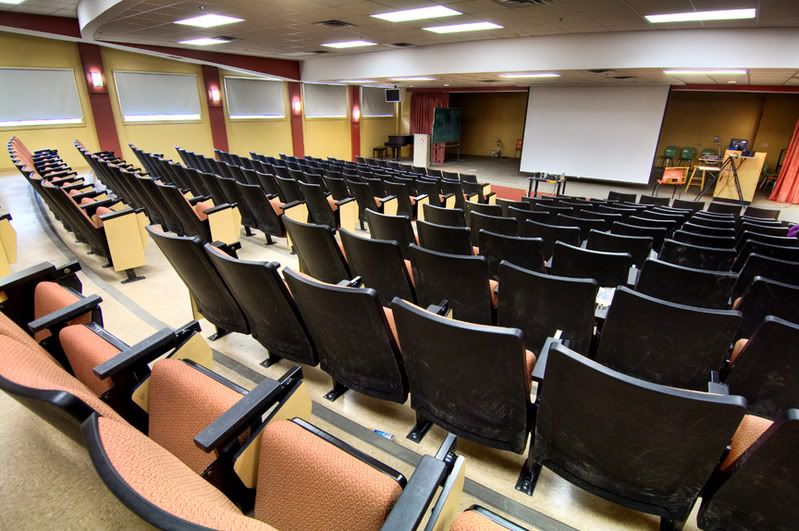
This last image was made by opening both the original (top) photo and the photomatix (middle) photo and dragging one onto the other so i ended up with one image that contained two layers. I of course held the shift key down so they would line up right. One more note is that i used a tripod on this shoot.
Before i get too far i should mention the "why" bother doing all this. I liked the photomatix image but just not the chairs as it really showed up every mark on the backs of them. I also felt the ceiling was just a bit dark.
With the one image opened and containing the two layers i then created a mask on the top layer, lets say that it is the photomatix image that is on top and the original on bottom. I painted in black on the mask over the chairs at an opacity of about 45% which i then just redid until i had them pretty well covered in black on the mask and the original below showed through clearly. I lowered the opacity of the brush to about 20% and painted over the dark part of the ceiling.
I think this was all i did on this one. Just realize that you have to change your brush size ([ key for smaller and ] key for bigger) when painting in your mask so you dont get spill on areas that you dont want masked. I also use a brush with a hardness of 0.
When checking out the differences in the photos take a look at the wall behind the stage. Much nicer in the photomatix and blended photo compared to the original. I thought all the walls looked better, the windows were better, lights better, and ceiling better.
No comments:
Post a Comment