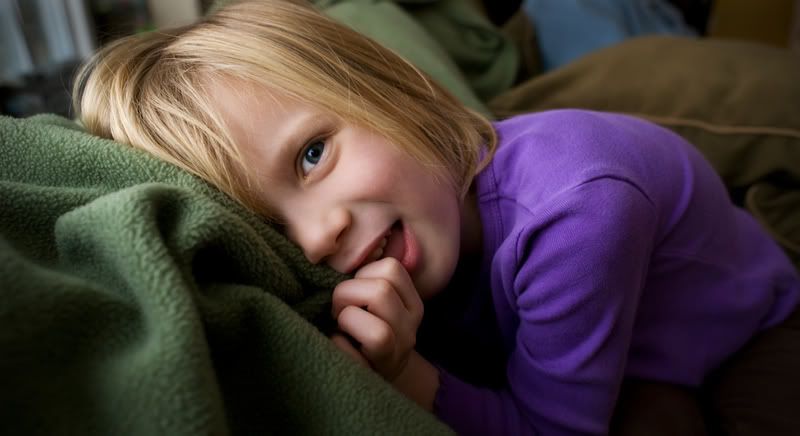
2009 is here and with it comes this photo that i took approximately 12 hours ago which i really, really, really, like.
It always amazes me how some shots stand out and grab center stage with both hands, to me anyway. Often times i wont even know what it is about a photo that has moved me until i take a real close look at it and dig in. Sometimes its the lighting, composition, coloring, emotion, etc, etc. A photo can grab you with only one of these all by itself or by a combination and often times it really does take a minute to figure it out.
This photo started for me with the light. My neighbor was just playing around on the couch with my cat phoebie. The light coming in from a large window to her left was beautiful so of course i said "would you like me to take your picture"? I put a 24mm lens on as i wanted to get nice and close so her face would be powerful in the frame but I could also take in some of the background. She looked out the window for a bit, then stuck her tounge out for awhile, and then got a little shy and started to cuddle the blanket on the back of the couch. I liked the other photos as well but this one was the magic.
In photoshop i did alot. The photo looked great right out of the camera and most of the things i did to it were very subtle but very much needed.
I started by figuring out a crop. This was not easy. I tried a square, then a loose, then a tight, and ended up with this. I did a fair amount of retouching next using the heal and clone tools. There was a hair that went right through her eyeball which i took out as well as some other little distractions. I wanted the viewer to be able to really look at that big eye, study it, think about what was going behind it, and then move on the the rest of the image when ready. To help the eye be more powerful i used the dodge tool set to highlights (10%) and dodged the eyeball. I also used the burn tool set to shadows (4%) and hit it once with that. When you do a before and after view of this effect it is amazing how much it helps the eye. Since it had a nice shade of blue i also used the sponge tool set to saturate on the colored part of the eye a little bit.
I then duplicated my background layer and added a vignette with the filter - distort - lens correction method. I wanted to have the center of the image pop and the background to not have any impact. I then created a layer mask and painted in black over the center of the image to make sure the vignette was not darkening it down and dulling the face. You will also notice that you can really bring out subtle parts of the image by painting in the mask with a lower opacity (40%). I wanted the thin green pillow behind her to act as a bit of a rim for the hair so the vignette darkened the outside and i brought the inside back with the mask.
I also wanted the background blurred a bit more so i duplicated the background layer again and then held the option key and drug the mask from my top layer to my new layer. This just copied the mask so that i now had it on both of my top two layers. I used lens blur and blurred it a fair amount.
I then just did a curve to darken the image down a bit in the three quarter tones and brought the highlights up a bit, used smart sharpen and was done.
If i could give anyone one piece of advice it would be the following. Play with the image in photoshop all you want but in the end make sure that none of your work can be noticed. For example, if i had lightened up the white of the eye any more it would have stuck out like a sore thumb. All your hard work has to look natural.
No comments:
Post a Comment