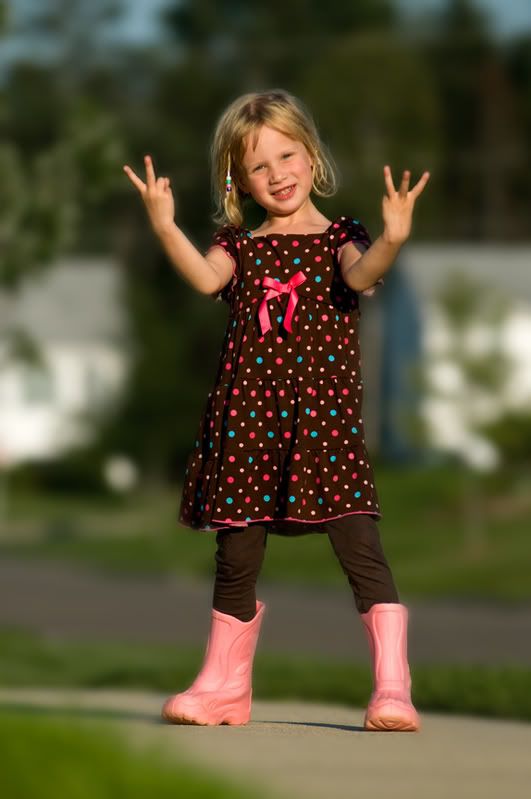
I took this photo tonight of one of my neighbors.
She did a bit of modeling on the sidewalk and i managed to snap off 63 frames.
I had a fairly shallow depth of field ( i think about f4) and i used a 200 lens for compression.
Once in photoshop i wanted to see if the background would look better if i blurred it a bit more.
I duplicated my background layer and then hid my top layer (background copy). I applied a gaussian blur of about 20% to the background layer. I turned the top layer back on and applied a layer mask to it which i then filled in with black. Then i painted in white with the paint brush where i wanted the blur on the underlying layer to show through (the whole background in this case).
This left me with a mask of a white background and the girl in black. To make her stand out a bit more i went to adjustments - hue/saturation and desaturated the background layer (only affecting the background because of the mask) and desaturated a bit, mabey 25%, cant remember now.
I then clicked on the top layer (will affect the girl only because of the mask) and added about 15% saturation to give her more color.
I sharpened the file, flattened it and was done.
One thing i noticed is that you can really tell how close your mask is to your subject if you take the saturation of the background layer all the way down. If you missed a spot or if you just didnt get close enough then you will see it clearly. Just cancel out of hue/saturation if this is the case and paint some more in white where you missed the first time.
One thing i notice about the photo after looking at it again is i find it fairly flat. I am not happy with my color and contrast adjustments i did in camera raw.
No comments:
Post a Comment