Monday, December 17, 2007

downtown hdr

Photo Sharing and Video Hosting at Photobucket
This may well be my last post from the images i shot in the freezing cold downtown a couple nights ago.
I processed three jpegs in photomatix and lowered the color saturation to the far left.
I sharpened it using smart sharpen.
I wanted to try a bit of sepia tone on it for the old fashioned look but i am tired tonight and going to hit the hay.
I still plan to work on something totally different over the holidays and that is combining multiple face photos.

Saturday, December 15, 2007

restaurant hdr

Photo Sharing and Video Hosting at Photobucket
I was doing some downtown shots tonight and tacked on some time at the end of my official duties to take some hdr shots. I did this even though it was unbeliveably cold. My fingers still hurt.
I did my standard 7 frame bracket and then used photomatix pro to process the images.
My settings in photomatix were as follows:
strength 100, color saturation 68, luminance -5, light smoothing low, white point 1.35, black point 5.86, gamma 1.01.
This hdr shot looks 100 times better than the standard straight shot.
What restaurant wouldn't love to have a funky shot in a brochure or ad piece.

Friday, December 14, 2007

camera image number

Here is just a little aside.
Ever wonder how many images your camera has taken in its life.
1) go into bridge and click once on the last image you've taken.
2) go up to file - file info.
3) click on advanced (left column) when the file info pops up and then click on the little arrow beside http://ns.adobe.com/exif/1.0/aux/ (in the right column).
4) at the bottom of that column you will see
aux:imagenumber:????
where my question marks are is where your cameras total image count will show.
I have had my camera for two weeks now and only have 1200 images on it.
Time to get shooting.

desaturated background

Photo Sharing and Video Hosting at Photobucket
I took this shot of my son last week after a big snow storm. It was the perfect image to desaturate the background, as it was mostly colorless to begin with, and make my subject really pop.
This is a really easy one.
I duplicated my background layer. With this new layer active i went to image - adjustments - desaturate.
I created a layer mask (bottom of layers pallate) and painted in black over my son so that the colored layer underneath would show through. I didn't have to be too fussy as it was mostly white behind him anyway. I used a smart sharpen at about 35 and did a curves adjustment to bring up the blacks a bit for added contrast.
I am hoping to do some experimenting for my next post. I want to use multiple shots combined to form one shot. these would be overlaid over and around each other, not stripped together. I will work on an edge effect so the shots are seperated.
Stay tuned. I also have some shooting to do this weekend of the downtown at night. I smell a hdr in there somewhere.

weird

Photo Sharing and Video Hosting at Photobucket
This is strange for me and no dont worry, i am not heading in some far out direction.
I took a photo of a girl i work with and converted it to black and white. I liked the shot but it didn't blow me away or anything. I thought it had enough potential to look at a second time and see what creative things i could do to it.
I started by duplicating my background layer and with the new layer active i went to filter - sketch - chrome. I used a detail of 0 and a smoothness of 10. I used a levels adjustment and cranked the sliders to the middle so i only had black and white tones.
I actually was going down a totally different route. I started by duplicating my blue channel as i was going to try and make a funky mask and bring parts of the original image through the chrome layer.
I thought this image i ended up with would make a cool poster if text was added.
One added note by the way: you can control how thick your black lines are by where your levels sliders end up. If they are closer to the black side or closer to the white side makes a difference.
For what i dont know.

Wednesday, December 12, 2007

theory of a retouch

Photo Sharing and Video Hosting at Photobucket
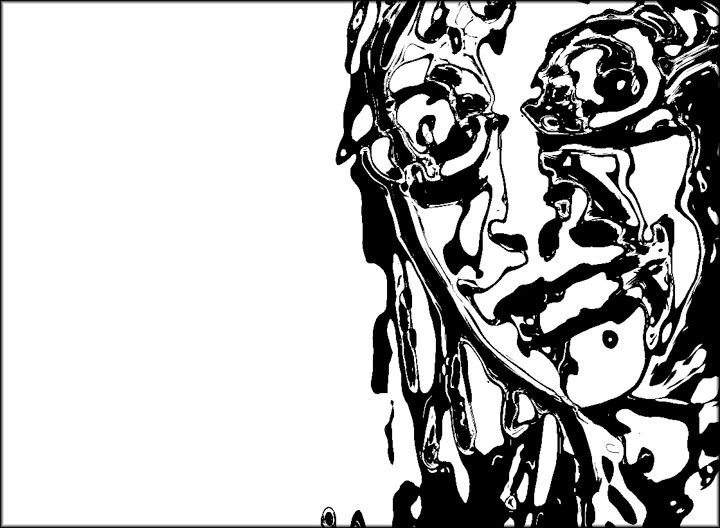
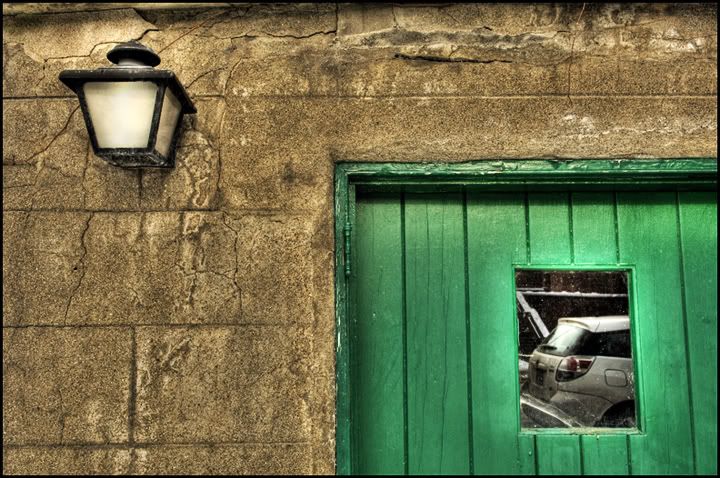
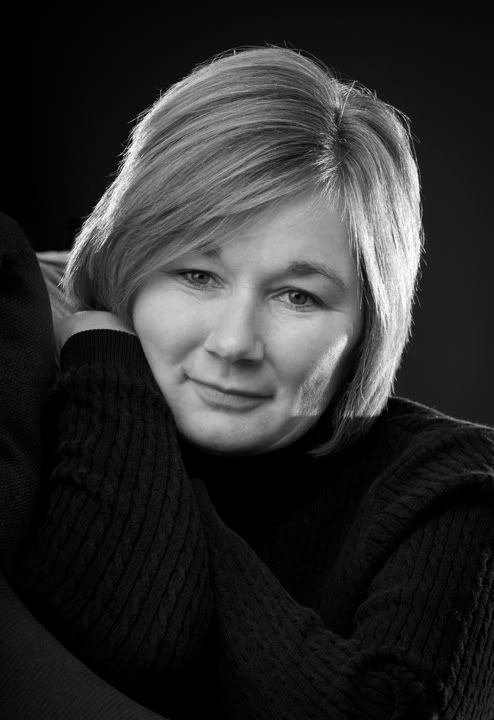
The image above got me thinking of a post on retouching.
There are many different views out there on retouching, from "oh my God, you cant retouch as then it is not pure or journalistic" to "anything goes". I like to think i am somewhere in the middle but definately closer to anything goes than to pure.
The camera and photoshop are tools in the image creation process and by developing your skill in both, you can create an image that you have envisioned.
Anyway, i am not trying to get all deep or anything, just trying to let you in on how i see the process.
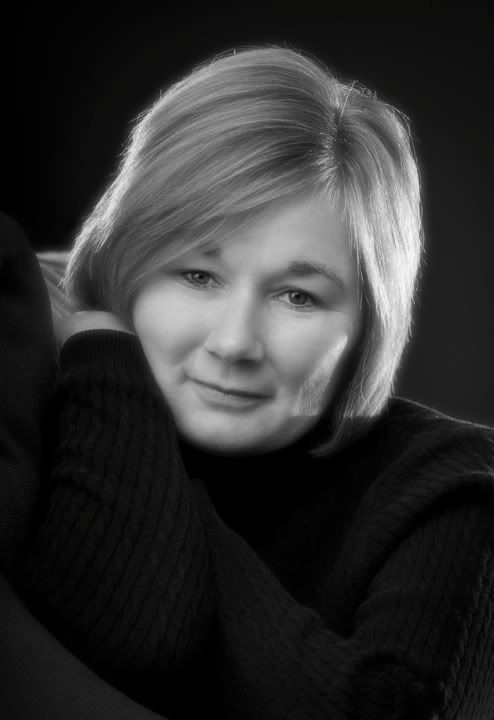
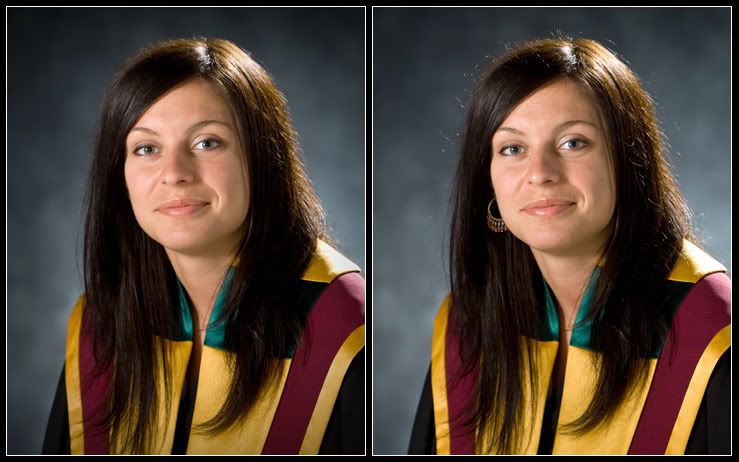
The image on the left is the final retouched version and the image on the right is raw from the camera.
How i tackle retouching is as follows. I first look at the image and decide what i want to look at. Her face for example. In the image to the right my eyes keep getting pulled off the face by the earring and more subtly by the hair highlights.
With these distractions removed I can take my time exploring the face. I tend to start at the eyes, wander around the face, and end up back at the eyes.
So, what i am trying to say is: When retouching, remove tension from the photo. Tension being those elements that want to rip your eyes away from what you really want to look at.
I used a combination of the healing tool, clone stamp, dodge, burn, sharpen, and ended by adding a vignette.

Tuesday, December 11, 2007

door

Photo Sharing and Video Hosting at Photobucket
Ok I know, this is another hdr image, let me explain.
I saw this doorway and had to shoot it as i thought it would look amazing in hdr. I used 7 bracketed images and ran them through photomatix pro. I did my thing with the sliders, no secret, just played until it looked right, and then opened the image in photoshop. I wanted to brighten up the lamp as it was grey and low contrast. I first duplicated my background layer. I selected the front pane of glass on the lamp and applied a celinderical gradient going from white to transparent. It looked a bit better but not great. I tried changing the layers blend mode to overlay and it looked better but the rest of the image got over saturated and looked a bit overdone (can you imagine). I desaturated the layer and bingo, everything fell into place.
I am now going to be playing with changing the blend modes of a duplicated layer and desaturating it.

Monday, December 10, 2007

car hdr

Photo Sharing and Video Hosting at Photobucket
I was looking to do something a little different tonight (using blending modes to combine photos) but found that i have to take some texture photos as i dont have any. Look for this in a post to come. I want to change skin into an ice texture.
Anyway, i did find this shot of my car that i shot on a tripod and shot 7 bracketed images. I loaded the 7 images into photomatix and played with the sliders. I gave my workflow in photomatix in an earlier post if your wondering.
When i had it how i liked it, i sharpened it alot with smart sharpen, probably with a value of about 90. I then wanted a very dramatic vignette so i duplicated my background layer and added a heavy vignette (filter - distort - lens correction) to this top layer. It darkened the car a bit so i just applied a layer mask to that layer and used a large soft edged brush to paint on the mask with 50 percent black. I just painted over the car and a bit on the ground and background around it for a bit of a halo effect. I used a curves adjustment layer to add a bit of contrast and was done.
Below is one of the originals.
I promise to get away from hdr for the next post although i do feel that using hdr took a pretty boring image and at least made it into something worth looking at.
Photo Sharing and Video Hosting at Photobucket

Thursday, December 06, 2007

softar filter effect

Photo Sharing and Video Hosting at Photobucket
I need to state right up front that this is not my method. I used one of my photoshop world text books for this and the credit for its development goes to eddy tapp and monty zucker. I felt i needed the effect for this image and wanted to share it with you.
First i opened my image in photoshop and went to image - adjustments - black and white. I placed my curser on the face and left clicked and dragged to the left to lighten the skin. I placed it over the sweater and dragged to the right to darken the sweater. You would have to play a bit with this depending on your image. When i had it looking good in black and white i duplicated my background layer.
Double click on the name of your new layer and call it darken. With this layer active, go to filter - blur - gaussian blur and up the radius to around the size of your file (mine was 25mb so i set it to radius 25). Change the blend mode to darken for this layer and lower the opacity to 30%.
Now duplicate this layer and double click on the name and call it lighten. Raise the opacity to 50% and change the blend mode to lighten. At this point if it looks too soft just redo the image and use a lower radius in the gaussian blur step.
Next hold down the shift key and click on both layers to make them both active. While holding the shift key click on the "new group" icon at the bottom of the layers pallate. Now click on the add layer mask icon at the bottom of the layers pallate.
Using a black soft edged brush, paint over the eyes, lips, eyebrows, and nostrils. I used an opacity of 50% to paint with. I did all these parts once and then did the eyes and lips one more time still painting at 50%. I tried the hair also but did not like it sharp on this image.
The original file is below.
As a side note: I was quite happy with the light on this image. I used two strobes bounced into very large umbrellas that were placed one directly over top of the other. This essentially gave me an umbrella which went from ceiling to floor. With using two lights i could vary the power from top and bottom. I placed these as close to her as i could, just out of camera frame. I used two sb24 flashes for the rim light. One was behind her to the left and one to the right.
Photo Sharing and Video Hosting at Photobucket

Monday, December 03, 2007

hdr gordo

Photo Sharing and Video Hosting at Photobucket
Here is another shot from the weekends adventure.
We haden't even really got to shooting yet but the light was so good in tim hortons that i had to run out to the car and get my camera. I put the camera in liveview to test it out and took three bracketed images handheld. I am posting the original files under this text so you can see them also.
I opened the images in photoshop just to knock them down to 8bit files (i had the camera set to 14bit) and saved them as jpegs.
I processed the three images two seperate times in photomatix and then stripped them together in photoshop. The reason i did this was that i liked his face and background in one of the trials and his hands and body in another. I just dragged one image onto the other and used a layer mask to do the work.
I am not giving my photomatix slider info just because it never seems to be written in stone. Just play with the sliders.
I wanted this look by the way in photomatix even though you may be screaming overprocessed. Gordo is truly a cartoonish figure and i felt the effect was needed.
Photo Sharing and Video Hosting at Photobucket

Sunday, December 02, 2007

fight on the beach

Photo Sharing and Video Hosting at Photobucket
I got to get away and have a little photo excursion today and now have a ton of new images with which to play with. I will be making many posts this month.
This image is made up of two images. I set the camera up on a tripod and I took gordos photo serveral times as he did some pretty funny jumps. He then shot me doing the same thing. I opened them both in photoshop and while holding down the shift key i dragged one photo on top of the other. My tripod is not the best and it was also sinking in the sand which resulted in the photos not being perfectly aligned. In photoshop cs3 under the edit menu there is a new function called auto align layers which i used next. To get this to be ready to use you have to first go into your layers pallate and highlight both layers.
Auto align worked perfectly on these except for the clouds as they were different in each image. I next highlighted the top layer and created a layer mask. Use a reasonable sized soft edge brush with black as your forground color swatch and paint over the image where you want the underground image to show through (gordo was hidden on the underground layer). This made both of us visible in the image. The sky was not perfect so where i over painted i then switched my forground swatch to white and painted over the over painted areas around gordo. I flattened the image, did a slight curves adjustment to warm it up a bit, smart sharpened 45% and was done.
You can have alot of fun with this. Try shooting yourself in multiple positions in a room and then use this method to strip the images together.